Which Backpacks Make Great Candidates (And Which Ones Don’t)
What we look for (quick, practical)
We want backpacks that will happily become a tote — not objects of a thwarted DIY meltdown. The good ones share a few simple traits: a strong top handle, straps that remove or tuck away, a plain back panel, and a roomy, unstructured interior. Think commuter packs and simple daypacks rather than technical hiking rigs.
Good examples: Fjällräven Kånken (classic top handle, simple boxy interior), Everlane’s Day Market Tote-style backpacks, and many laptop-friendly bags from brands like Timbuk2 or Herschel. These are easy to flip into a tote with minimal fiddling.
Editor's Choice
Convertible Laptop Tote Backpack for Women
Fits up to 16-inch laptops; multiway carry
We use this convertible tote as a backpack or shoulder bag depending on our mood, and it neatly fits up to a 16-inch laptop. The water-resistant fabric and organized pockets keep our gear safe and our sanity intact.
We’ve learned the hard way: some backpacks fight back. Watch out for:
Integrated frames or external stays (hello, medieval sculpture backpack — we tried to tote it and regretted it).
Thick molded hip belts and load-bearing harnesses (they don’t tuck or lie flat).
Complex strap systems with multiple buckles and webbing that can’t be removed.
Very rigid clamshell designs with narrow openings — not tote-friendly.
A quick note: full-featured hiking packs like Osprey Atmos/Aura series or expedition packs are usually off the table. Great for peaks, terrible for effortless tote conversion.
Quick, under-a-minute checklist (eyeball test)
Use this on a casual shop visit or before you start the conversion:
Is there a sturdy top handle that can bear weight? (Pull up like you mean it.)
Do the shoulder straps detach or at least lie flat against the back panel?
Is the back panel mostly flat and unpadded, or removable?
Does the main compartment open wide with room to hold a few folded items?
If you answered “yes” to at least three, we’re in business. If the pack has a full frame or a belt that won’t lie flat, politely leave it on the shelf and save yourself the theatrical unpicking later.
A quick real-world tip
We always test by packing the bag as we usually would, lifting by the top handle, and slinging it sideways to see whether it reads like a tote or a rigid sculpture. If it feels awkward as a hand-carry, it’ll feel awkward after conversion — and life’s too short for awkward bags.
2
Tools, Materials, and Quick Preparations (No Fancy Gear Required)
The modest toolkit we actually use
We keep this handful of tools on the shelf so conversions stay fast, tidy, and non-terrifying.
Screwdriver or seam ripper — A small Phillips and flathead for removing hardware, or a seam ripper to quietly unpick stitches. (Yes, the seam ripper is our quiet little hero when straps are stitched on.)
Heavy-duty needle and thread (or a sewing awl) — Think upholstery/ bonded nylon thread or a Speedy Stitcher-style sewing awl for stitching through thick fabric. It’s stronger than regular sewing thread and lets us reinforce new attachment points.
Spare D-rings or carabiners — Swap in cleaner attachment points or clip straps out of the way; handy if original hardware is rusty or oddly shaped.
Optional: rivets, a hand riveter, or fabric glue — Rivets make things bombproof; fabric glue is a fast patch when you want to avoid holes.
Small pair of pliers, sharp scissors, and masking tape — Pliers pull stubborn rivets; scissors trim stray webbing; tape marks position before we commit.
Handy Essential
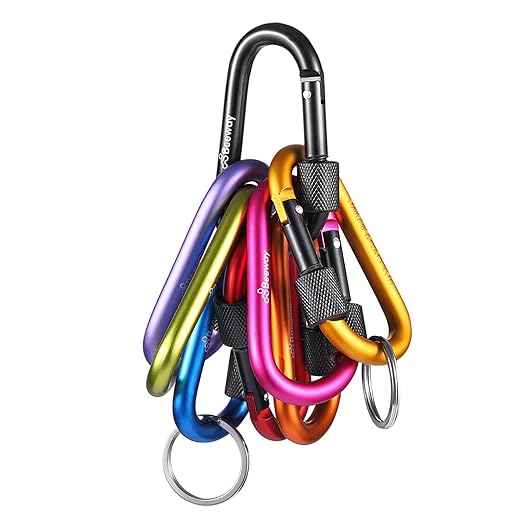
Pack of Locking Aluminum Carabiners for Outdoors
Lightweight, durable clips for keys and gear
We keep these lightweight locking carabiners handy for keys, water bottles, and gear — they clip on fast and won’t let go. They’re super useful around backpacks and travel gear, but we don’t use them for climbing (safety first!).
Screwdriver/seam ripper: detach without mangling the bag. We once shredded a strap trying to pry it off—lesson learned.
Heavy-duty needle/awls: regular needles bend; these don’t. They let us resew handles or create tote-style anchor points.
D-rings/carabiners: quick, reversible fixes. Clip, carry, and unclip when we want the backpack look back.
Rivets/glue: rivets give a professional hold; glue is for quick, temporary fixes (think festival weekend, not heirloom restoration).
Low-cost / no-sew alternatives
Use carabiners or locking D-rings to clip and re-route straps without sewing.
Heavy-duty double-sided fabric tape plus Gorilla Glue for temporary bonds.
Sew-on strap extenders from an outdoor store instead of custom stitching.
Quick prep steps (two minutes tops)
Empty the bag and shake it out (mystery receipts be gone).
Remove straps and loose inserts; label anything you’ll reinstall.
Brush seams and zipper channels with a dry toothbrush; spot-clean obvious grime.
Inspect stress points and mark with tape where we’ll add new hardware.
Now we’re set to convert without wrestling lint, crumbs, or regret.
3
Step-by-Step Conversion: From Backpack to Tote (Fast & Foolproof)
This is our hands-on playbook. We’ll walk through the photo-friendly sequence we actually use: detaching or re-routing shoulder straps, reinforcing or repositioning attachment points, creating a sturdy top handle, and adjusting silhouette so the bag reads as a tote (not a lopsided backpack). We kept the language short because epoxy and stubborn webbing don’t like long meetings.
Step 1 — Detach, label, and re-route shoulder straps
Unclip or unpick the bottom of each strap (seam ripper or screwdriver). Leave the top attachment if it’s clean—those top D-rings make great anchor points.
If you want a reversible quick fix: clip the two strap ends together at the top with a locking carabiner so they form a single tote handle.
Label hardware with masking tape so reassembly is painless.
Step 2 — Reinforce or reposition attachment points
Move load-bearing anchors up toward the bag’s rim; the tote needs top support, not hip-level anchors.
For a permanent hold: sew with upholstery thread or set small rivets at the new points. For a weekend-only hack: sew-on D-rings or use heavy-duty fabric glue with a backing patch.
We once tried glue-only and watched the handle slowly droop—lesson: if you plan to carry groceries, reinforce.
Versatile Pick
4-in-1 Convertible Large Canvas Tote Bag
Transforms into backpack, crossbody, shoulder bag
We love that this roomy canvas bag morphs into a backpack, crossbody, shoulder tote, or hobo — like a bag with commitment issues. It’s sturdy, comfy to wear, and perfect for work, travel, or running errands.
Step 3 — Make a sturdy top handle (two-minute and pro versions)
Fast: loop existing webbing ends together, secure with a locking carabiner or binder clip padded with tape.
Better: stitch a leather or canvas handle into the new top anchors with a Speedy Stitcher or rivets. This gives a clean tote look and stops that annoying twist.
Pro tip: a 12–16″ handle is comfortable for shoulder carry; 14″ is our sweet spot.
Step 4 — Adjust the silhouette and stabilize the base
Tuck or remove sternum/hip belts; fold or snap top flaps inward so the profile reads tote, not pack.
Add structure: insert a trimmed cutting board, stiff cardboard wrapped in fabric, or a ready-made bag base to stop sagging.
If the sides are boxy, pin a small pleat or sew a quick 1″ tuck at each corner to slim the profile—our first tote looked wobbly until that tiny tuck saved the day.
Quick safety & load-balance checklist
Center heavy items low and close to the middle.
Test with 10–15 lb before full use.
Check seams and hardware after the first three outings.
4
Troubleshooting, Variations, and Style Tweaks
Stitches coming loose? Fixes that actually hold
If seams start to sigh under weight, don’t panic—we’ve been there. Quick, stronger fixes:
Replace weak thread with upholstery or bonded nylon thread and use a denim/leather needle in a heavy-duty machine or a Speedy Stitcher for handwork.
Reinforce stress points with a small leather or canvas patch sewn on with a box-X or bar-tack pattern (those little X’s are our favorite invisible insurance policy).
Swap suspect stitched anchors for rivets or screw-studs when possible; a handheld rivet setter is inexpensive and makes one confident grocery run feel heroic.
Need more structure? Lightweight inserts and hidden boards
If your tote still flops, add structure without turning it into a briefcase:
Trim a thin bamboo cutting board, corrugated plastic (coroplast), or a craft foam board to the base shape and wrap it in fabric. Slip it into the bag base or secure with Velcro tabs.
For side support, cheap placemats or a folded stiff interfacing sandwich do wonders.
Best for Organization
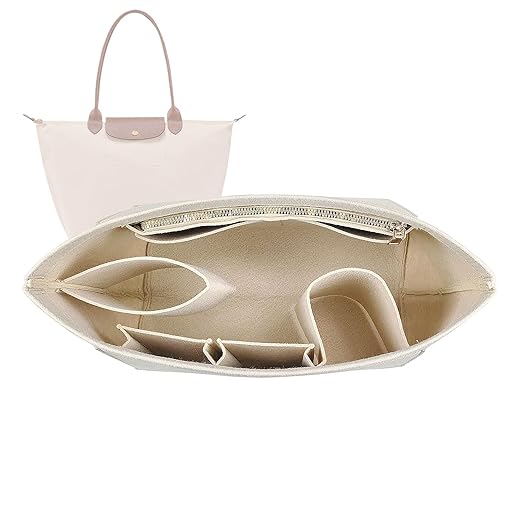
Felt Tote Bag Organizer Insert for Handbags
Keeps purses tidy and shape intact
We slip this felt insert into our tote to organize pockets, protect the interior, and keep the bag’s shape like a tiny bag butler. Multiple pockets hold bottles, phones, and cosmetics so we stop digging around like treasure hunters.
A felt insert gives instant pocket organization and stiffer walls without fuss—our go-to for short trips when we don’t want to carry a full board.
Quick mods: crossbody, wristlet, and fold-flat travel tote
Want one bag that does it all? Fast conversions:
Crossbody: attach a swivel lobster clasp to a new or old D‑ring, run 1″ webbing with a tri‑glide slider for adjustability, and clip on. Instant hands-free hero.
Wristlet handle: fold a 6–8″ strip of leather or webbing, rivet or sew it near the top edge with a snap for easy removal.
Fold-flat travel tote: add two side snaps or short strips of Velcro so the bag collapses flat—perfect for stuffing into suitcase pockets.
Style tweaks and the little hacks we love
Small changes punch above their weight:
Swap a bland zipper pull for a leather tassel or an enamel charm.
Add a padded strap cover from an old scarf for comfort and a splash of pattern.
Replace a mismatched interior pocket with our felt organizer or sew in a contrasting lining for a designer vibe.
Our weirdest happy accident: an exposed stripped zipper looked unfinished—so we painted it gold. Now people ask where we bought it.
These are the practical and playful moves that keep our converted tote useful and characterful. Next up: how to care for the bag, balance loads like pros, and pick smart everyday uses.
5
Care, Load Tips, and Everyday Uses for Our Converted Tote
Gentle maintenance so the hardware and stitches last
We treat our converted tote like an honored roommate: regular, small acts of care keep it from staging a rebellion. For canvas or nylon bodies, spot-clean with a damp cloth and mild soap; for stubborn grime, use a soft brush and cold water. Remove inserts and air-dry—never tumble-dry.
For leather handles and trim, a little conditioner goes a long way. We use a leather cleaner/conditioner every few months and rub hardware (brass, nickel) with a microfiber cloth to prevent tarnish. If seams fray, anchor them quickly with a dab of fabric glue or clear nail polish before you stitch properly.
Premium Care
Leather Handbag Cleaning and Protection Care Kit
Cleaner and protector made for luxury bags
We clean, condition, and protect our favorite leather bags with this kit — it removes dirt and repels stains (not suitable for suede or nubuck). It includes 125ml cleaner and protector bottles, a sponge, and a cloth to keep our designer pieces looking smugly new.
Uncontained liquids—use zip-locks or dedicated bottles.
Constantly overloaded carries—if the anchors weren’t reinforced, keep daily weight under ~15–20 lbs.
Everyday scenarios: where our tote shines
Commuting: Slip your 13–15″ laptop into a padded sleeve (Tomtoc or Incase styles fit well), keep chargers in a small zip pouch, and use a crossbody strap for hands-free walking. The tote beats a stiff briefcase for bike-to-office days—if you’ve added a non-slip strap pad, even better.
Grocery runs: Our “tote vs. groceries” field test: with a base insert and reinforced handles, the tote survived 12 cans, a loaf of sourdough, and a bag of apples without protest. Use reusable produce bags to keep wet fruit off fabric.
Weekend markets: The open top and wide mouth are perfect for flowers, bread, and that vinyl record you couldn’t resist. Add a small carabiner for keys and a detachable coin pouch for cash.
Travel carry-on: Collapseable canvas tucks into overhead bins; keep passports and valuables in a zippered interior pocket. Fold-flat designs pack into suitcases easily.
Quick style pairings
We like wrapping a skinny silk scarf around the handle, pairing the tote with ankle boots and a denim jacket for casual weekends, or a structured blazer for business-casual days. Little touches—colorful strap covers, a leather tassel—make the bag look intentional, not improvised.
With these care and use tricks, our tote is ready for every day and every little adventure. Next up: the final wrap-up and a nudge to go make your bag do more.
We Did It—Now Go Make Your Bag Do More
We turned a backpack into a useful tote quickly and we gained versatile gear, saved money, and had fun improvising—imperfections welcome, they give character. Remember: small seams, quick trims, and clever strap swaps are all that separate a weekday commuter from a beach-ready carryall.
If you’re nervous, practice on a thrift-store find and share photos or tips with us — we’ll cheer you on. One bag can now handle two very different days in our lives; go make yours work harder, laugh at the stitches, and enjoy the new possibilities, and share.