Why We Packed Light (and Took Notes)
We decided to treat backpacks like lab rats — only lighter and with fewer snacks. We ran a series of multi-day trips to see how small changes in weight changed big moments on the trail. Our goals were simple: comfort, durability, and fewer complaints at camp.
We compared lightweight packs and packing strategies. We tracked ounces, shoulder pain, and camp morale. We tried fit tweaks, scale wars, and a few ridiculous experiments that ended in laughter.
Ahead: what we carried, what we shaved off, how packs fit, trail trials with real failures, and a field-proven checklist of what we recommend — and what we don’t. Read on for lightweight wins and a few humbling stories.


Choosing the Contenders: What We Carried into the Field
How we picked — the short version
We wanted packs that could serve real multi-day trips, not just Instagram-friendly “I-carry-a-jacket” demos. So we chose a spread: framed and frameless, ultralight and “practical light,” and a couple of heavier-duty models for comparison. Our aim was to test what hikers actually face: variable weather, real food loads, and the occasional overenthusiastic snack haul.
Selection criteria (what mattered)
We rated candidates by:
We sampled models like the Osprey Exos, Hyperlite Mountain Gear 2400, ULA Circuit, and a frameless Zpacks pack for contrast.
Practical constraints we actually used in the field
We planned food at 2,500–3,500 kcal/day per person (trail mix + real food), carried 1–3 L water depending on resupply frequency, and sized packs to swallow our sleep system — a 20–30°F synthetic bag or a 30°F down quilt compressed to roughly 8–12 L. Rain layers and an extra insulating layer were non-negotiable for our chosen seasons.
Baseline metrics (how we measured)
Feature trade-offs that guided choices
Next up: we take those contenders to the scale and the trail — see how ounces turned into sighs (and occasional high-fives) in our Scale Wars.
Scale Wars: Our Weight-Reduction Experiments
We dove into this like scientists with a fondness for snacks: systematic, slightly over-caffeinated, and ready to trade comfort for speed. The point was simple — shave ounces stepwise, measure the human outcomes (pace, fatigue, mood), then decide whether the trade was worth it. Spoiler: sometimes a single pound made the day feel like a different trip.
How we ran the tests
We ran the experiments in repeatable rounds so comparisons weren’t emotional (well, mostly). Our protocol:
Base-weight categories we staged
We deliberately staged three realistic tiers so we could watch how behavior changed:
On steep climbs the difference was obvious: moving from Classic to Lightweight shaved fatigue and reduced snack-stop time. Ultralean loads felt zippy but made some of us miss a pillow or spare fleece on cold nights.
Swap examples and what actually changed
Practical, immediately useful tips
We tracked mood as much as miles — because if lighter gear makes you grin on the climb, that’s data too.
Fit, Comfort, and the Art of Not Hating Your Shoulders
A lightweight pack only matters if you can actually wear it for days without plotting revenge. We spent as much time tweaking straps at trailheads as we did swapping stoves — and yes, the awkward hip-sway test made its dramatic cameo.
Dialing in torso and hipbelt
Getting torso length right is the baseline. Measure from the C7 vertebra (big bump at the base of your neck) down to the top of your iliac crest (hip bone). Most shops will measure you, but at home you can do the same with a friend and a tape. The hipbelt should sit squarely on that iliac crest — not your waist, not your ribs.
Load-lifters, harness padding, and the padding trade-off
Load-lifters (the straps from shoulders to top of hipbelt) should be at roughly a 30–45° angle. Too vertical and the pack will pull on your shoulders; too flat and the load slides away from your hips.
Minimal padding saves ounces, but we learned that a well-shaped hipbelt (Gregory Baltoro, Osprey Atmos AG) beats thick padding that squishes and chafes over miles. Frameless ultralight packs (Hyperlite, Zpacks) reward careful packing and hipbelt technique — they’re forgiving when you know what you’re doing, maddening when you don’t.
Packing for balance: what stays close to your back
Think heavy-to-midweight, close-to-back, low-and-centered: stove, fuel, denser food, and water (or weight near the middle when full). Lighter, bulkier items (sleeping pad, jacket) go farther from the back or at the bottom. Use compression straps to lock that heavy mass tight; a jiggly load is a grumpy spine.
Outer pockets are for easy-access essentials: rain jacket, snacks, map, sunscreen. Keep hydration tubes routed so they don’t yank on your shoulder strap when you take a sip.
Ventilation and frame behavior on downhills
Mesh-back systems (Osprey Atmos AG) breath better in summer; foam/contact backs shed weight and can be warmer but more stable. On long downhills, stiffer frames track and reduce torso whip — they feel planted. Softer frames let you feel the trail more, which can mean more hip and shoulder micro-adjustments (and the occasional dramatic hip-sway that made us laugh).
Quick at-home and trail fit checklist
Try these tweaks on a local loop first — your shoulders (and your sense of humor) will thank you.
Trail Trials and Funny Failures: Real Trips, Real Lessons
The rainy scramble that humbled our ultralight rain setups
On day two of a three-day scramble we hit a persistent, sideways downpour and learned the hard way that “waterproof” is a conversation, not a promise. Our featherweight rain jackets (think Montbell and Outdoor Research Helium II) shrugged off the first hour, then creased and pooled on ledges, letting water seep at the seams. The person who grabbed emergency ponchos and a few large trash-compactor bags stayed the driest — less elegant, more functional. After a half-hour of improvising, we used safety pins and a strip of tenacious duct tape to fashion a hood for a torn jacket. Gear after three days: one taped sleeve, two soggy packs that dried out overnight, and grimy boots.
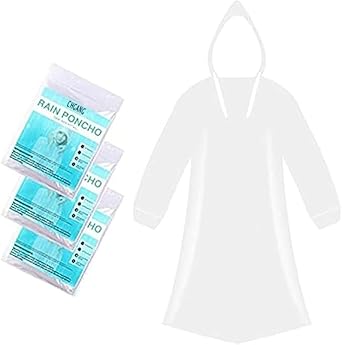
Lesson: carry a dumb, reliable backup that doesn’t care about breathability. Wry aside: we earned exactly zero fashion points.
The river crossing that revealed closure loyalties
At a shallow ford, the person with a roll-top dry bag tossed their pack across the current, then shrugged and waded — dry phone and stove intact. The zip-top daypack carried by another team member took on an inch of water because its external daisy chain let the top unseat during a slip. In the scramble to bail water, we jury-rigged a zipper pull from paracord and used a pack strap to lash a wetpack to a drypack. After three crossings over two days, roll-tops stayed dry, lids leaked if overloaded, and internal stuff sacks won the trust vote.
Lesson: roll-tops + internal dry sacks are your river-crossing friend; zippers are drama queens. Wry aside: we now have opinions about zippers that are uncomfortably passionate.
The night the minimal sleep kit traded warmth for stubborn pride
One night, someone insisted a thin quilt and a NeoAir would be enough. Temperatures dipped, the pad leaked a slow hiss, and every shiver produced poetic regret. We patched the puncture with the repair kit and shared spare insulation (puffy jackets make excellent communal blankets). Food bulk bit us here — our “lightweight” meals actually came in massive packaging that hogged bottom-of-pack space, forcing a sad triangle of sleeping gear around the stove.
Lesson: test sleep systems together and pack compact food pouches — warmth trumps gram-counting. Wry aside: the outspoken minimalist slept nearest to the stove thereafter.
Quick field-fix list we used
These were honest trips: bruises, laughs, and clearer packing instincts after every mistake.
Field-Proven Checklist: What We Recommend (and What We Don’t)
We boiled down weeks of testing, soggy mistakes, and triumphant tastings of PB&J into a no-nonsense checklist. Treat it like a field map: practical, occasionally funny, and immediately usable.
Pack volumes & base-weight targets
Base-weight (without consumables):

Must-have features (don’t skimp here)
What to skip if you want ounces
Packing order & quick swaps that deliver
Quick troubleshooting (trail-tested)
We try to keep recommendations cheerful and realistic — practical choices that saved us grams and arguments. Next up: our final verdict and the one sentence that made the pack nerd in our group cry laughing.
Light Wins (Mostly) — Our Final, Cheerful Verdict
We found that shedding ounces makes multi-day hiking more enjoyable — faster miles, less fatigue, and happier snack breaks. Lightweight packs delivered real benefits when paired with a proper fit and realistic gear choices. The savings vanish if shoulder straps bite or you skimp on safety gear; weight is a tool, not a mandate.
We encourage you to experiment with scales, tweaks, and ridiculous packing hacks with us — and to laugh when a funny failure teaches a better choice. Test setups in conditions like the ones you’ll hike. And please: prioritize comfort and safety over style points. Share your wins and wipeouts — we’ll compare notes over trail stew. Bring good socks and sunscreen, always.