Why I Tried Going Cuffless
I swapped my arm cuff for a smartwatch out of convenience, curiosity, and a wish for clearer patterns in my day-to-day blood pressure. I was tired of bulky kits and sporadic readings. A wrist device promised more frequent measurements and less fuss.
I don’t expect cuffless readings to perfectly match clinic cuffs. They’re promising, not magical. In this article I’ll explain what the watch actually measures, how sensors and algorithms turn signals into numbers, and how devices get calibrated and validated.
I’ll also cover accuracy limits—when I trust the watch and when I reach for a cuff—and practical tips I use: setup, regular calibration, and sharing results with my clinician. Read on to learn more today.

My Personal Journey: From Cuff Anxiety to Wearing a Watch
Why I finally made the switch
I was sick of the ritual: dig out the cuff, wrestle with tubing, re-center the cuff after a bad fit, and then wait for one cold snapshot that might miss the spike I’d felt an hour earlier. I wanted continuous context — trends across the day — not just lonely numbers. Curiosity pushed me to try a cuffless option on a smartwatch-like device that promised easier, more frequent readings.
The first week: setup and surprises
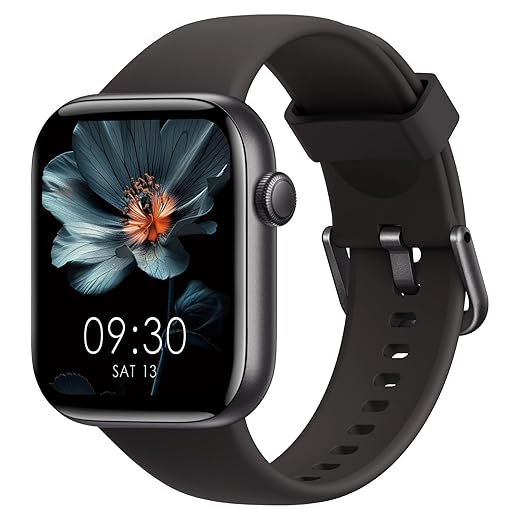
My first week felt like onboarding a new pet. I unboxed, updated firmware, and followed a strict calibration routine with my clinic cuff. The watch I started with (a Galaxy Watch model with BP support) required a snug, consistent strap placement and periodic recalibration against a clinical cuff. A few things surprised me:
Practical rituals that stuck
I developed a simple daily routine that made the device useful rather than annoying:
Why I kept going
The small wins added up: catching morning elevations, confirming that afternoon walks helped lower readings, and having easy charts to show my clinician. The watch didn’t replace my cuff—at least not yet—but it became my go-to tool for spotting patterns. Next, I’ll break down what the watch actually senses and how those signals become a blood pressure number.
What’s Under the Hood: Sensors and Signals the Watch Uses
Photoplethysmography (PPG): the optical heartbeat
The core sensor on most cuffless watches is PPG — a little light (green, red, or infrared) that shines into my skin and measures tiny changes in reflected light as blood pulses through the wrist. That pulse waveform is rich: you can see the systolic peak, the dicrotic notch, and subtle timing features. In practice, PPG gives amplitude and shape information that correlates with vascular tone and pressure.
Quick tips I learned:
ECG and timing: adding an electrical reference
Some watches (like ones with an ECG feature) record the heart’s electrical spike (the R-wave). That gives a precise timestamp of when the heart ejects blood. Paired with PPG, you can measure pulse transit time (PTT) — the delay between the electrical beat and the pulse arrival at the wrist. PTT (or related pulse-wave-velocity measures) tends to shorten as blood pressure rises.
If your watch has ECG, it usually improves timing-based BP estimates. If it doesn’t, manufacturers may rely more heavily on PPG shape and machine learning.
Motion, contact, and accelerometers: quality control
Accelerometers and gyroscopes are the watch’s motion police. They:
Practical step: if the watch shows a “bad contact” or “too much motion” warning, I stop and retake the reading after a minute of stillness.
From raw waveforms to a blood pressure number
What the user sees — “120/78 mmHg” — is several steps downstream:
A practical takeaway: calibration matters. I do mine after resting, and I take a couple of consecutive cuff readings so the watch has good training data.
Next, I’ll dig into how that calibration happens, the algorithms that do the heavy lifting, and how devices get validated against clinical standards.
From Candidate to Verified: Calibration, Algorithms, and Validation
Candidate vs. verified — how I think about the difference
When I say “candidate,” I mean the watch’s first-pass guess: the mmHg value the raw sensors and on-device model spit out. It’s informative, but it’s not yet trustworthy for clinical decisions. “Verified” means that guess has been checked and adjusted — by me (personal calibration), by comparison to population models, and ultimately by clinical validation or regulatory review. Verification converts a neat number into something I can rely on.
How I calibrated my watch (step-by-step)
I treated calibration like training a new pair of glasses: careful, repeated, and done under predictable conditions.
If the watch app allows, I did follow-up calibrations after a week and any time I changed medications, lost/gained significant weight, or felt the readings systematically drifted.
Algorithms, updates, and why validation matters
Behind the scenes, manufacturers use machine-learning models trained on many people’s paired cuff and sensor data. Good companies publish validation studies (look for peer-reviewed papers or FDA/CE statements). Algorithm updates can improve accuracy, but they can also change your baseline — so I treat major firmware updates as a prompt to recheck with my cuff.
Practical tips:
Doing these steps turned the watch’s “candidate” numbers into verified values I could discuss with my clinician — and it gave me confidence to use cuffless readings as part of my daily picture of blood pressure.
Understanding Accuracy and Limits: When I Trust the Watch (and When I Don’t)
I learned the hard way that a cuffless watch is a fantastic daily mirror for trends — but not always a crystal-clear single-point measurement. Below I lay out the practical factors that changed how much I trusted a given reading, and clear rules I use to decide when to rely on the watch and when to break out a cuff or call my clinician.
What commonly degrades accuracy
I pay attention to a few recurring troublemakers that I’ve seen in my own data.
A single example: after a weekend of sunburned forearms my morning readings were noisy until the skin recovered — switching to the opposite wrist briefly fixed it.
How I interpret the numbers (trends vs. single readings)
Cuffless devices are typically better at directional changes than an exact mmHg in the clinic.
Practical rules I follow
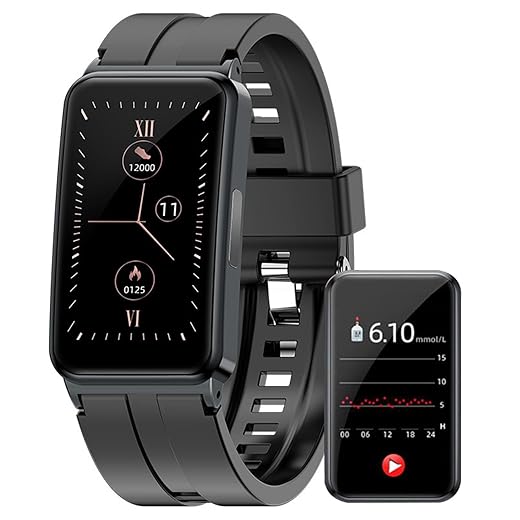
Devices worth noting: some Samsung Galaxy Watch models include BP features in supported regions; Aktiia and research bracelets aim for continuous trends — but check validation and region support before relying on them.
These practical checks help me use the watch confidently for daily monitoring while knowing when to fall back on medical-grade tools.
How I Use My Watch Daily: Tips for Setup, Calibration, and Sharing Data with My Clinician
Positioning and fit: the small things that matter
I treat wrist placement like a ritual. I wear the watch about 1–2 finger-widths above my wrist bone, strap snug enough that the sensors don’t slip when I move, but not so tight they pinch. I clean the sensor with a soft cloth every few days and swap wrists if my skin or hair is causing noise. For me, the right fit cut noisy readings by half.
My calibration routine (step‑by‑step)
I follow a simple protocol whenever I re-calibrate against a validated upper-arm cuff:
I recalibrated weekly during the first month, then every 3–4 weeks afterward. I also re-calibrate after major events: medication changes, weight swings, or any odd sustained drift.
App settings & permissions I enable
I enable these in the companion app and phone settings: background app refresh, Bluetooth, and Health/HealthKit permissions so readings sync automatically. I turn on calibration reminders and allow export to CSV/PDF. I keep motion-detection or continuous monitoring off at night unless I’m tracking a specific episode to save battery.
Tracking trends, not single numbers
I record morning and evening averages rather than obsessing over single readings. I use 7-day and 30-day rolling averages and flag any sustained change >10–15 mmHg. When something looks off, I re-check with a cuff, then annotate the date in the app (e.g., “started lisinopril,” “post‑flight”).
Sharing with my clinician
My clinician prefers charts, not screenshots. I export a 2–4 week PDF with timestamps and notes, or share data via Health app (if supported). I bring a printed 7‑day average and any outliers marked with context (symptoms, meds, activity).
Battery & privacy practicalities
I charge nightly—quick top-ups keep features working—and enable low‑power modes during long days out. For privacy, I review the vendor’s data policy, opt out of unnecessary cloud sharing, and keep local exports for my records.
Next, I’ll wrap up what these daily habits taught me about living with cuffless monitoring.
Wrapping Up: What I Learned Going Cuffless
Going cuffless with my smartwatch gave me easier access to blood pressure trends and a much greater daily awareness of how lifestyle, stress, and sleep affect my numbers. It’s not a replacement for clinical cuff measurements — it’s a candidate technology that became valuable because I learned to calibrate, verify against a cuff, and interpret the trends rather than fixate on single readings.
If you try cuffless monitoring, do it thoughtfully: follow setup and calibration steps, double-check suspicious readings with a validated cuff, and share patterns with your clinician before changing treatment. Used as a complementary tool, it empowered me to take more informed, everyday steps toward better heart health. Try it today, responsibly.

Really enjoyed the tech deep-dive. A few nerdy q’s:
1) When you say ‘sensors and signals’, are we mostly talking PPG + accelerometer fusion? Or is there optical tonometry or cuff-like pulse wave analysis in those Hilo and non-invasive glucose smartwatches?
2) How transparent are the calibration algorithms? Do vendors publish validation protocols (like ISO or AAMI) or is it a black box? I worry about drift and sensor aging.
Also, curious if anyone has compared the Non-invasive Glucose Smartwatch with ECG and Sensors to a dedicated BP wearable for signal quality — feels like trying to be a Swiss Army knife vs a scalpel.
Great technical questions. Short answers:
1) Most cuffless BP watches rely on PPG (optical) plus accelerometer/gyro for motion correction and sometimes skin-contact sensors; pulse transit time (PTT) derived from ECG+PPG is also used in devices that include ECG. Optical tonometry is less common in consumer watches.
2) Validation transparency varies. Some brands publish ISO/AAMI-style validation reports or peer-reviewed studies; others only show internal data. I highlight in the ‘From Candidate to Verified’ section how calibration and third-party validation are the key differentiators.
Regarding the multi-sensor watches (glucose/ECG/BP), they can be promising but often trade off specialization. Sensor fusion helps, but calibration and external validation are crucial. —admin
I worked briefly with a team doing PTT algorithms — drift is real, especially with skin changes or strap looseness. Frequent recalibration and firmware updates helped a lot in our tests.
Regarding sensor aging: sweat and dirt can degrade optical sensors. Regular cleaning and replacing bands helped maintain signal quality for me.
If you want a scalpel, go upper-arm cuff. For trend detection and convenience, PPG+PTT watches are fine. My engineer friend says always check if the company has published validation or at least an FDA/CE claim.
I’ve seen a device that used ECG+PPG for PTT and got decent correlation to cuffs in a small study. But the study size and population matter — many validations are limited to young, healthy users which skews results.
This was super practical — loved the step-by-step calibration tips in the ‘How I Use My Watch Daily’ section.
I use a 1.85″ Bluetooth Calling Sports Smartwatch with IP68 and it’s been decent for walking and sleep tracking, but I’m nervous about sharing data with my clinician (privacy + too much noise).
Does anyone have a simple workflow for exporting just BP trends rather than the whole fitness history? My doc asked for printable data and I panicked 😅
Good question, Priya. Many watches/apps have an export CSV or PDF option in settings — look for ‘share health data’ or ‘export reports’. If the app lacks that, some clinicians accept screenshots of a week-long trend graph. I recommend adding brief annotations (med changes, exercise) for context. —admin
My watch app lets me email a PDF report for a selected date range — then I trim it to only BP. If your app doesn’t, try a screenshot + simple notes app to make a one-page summary.
Short and silly: thanks for proving a watch can judge my blood pressure AND my inability to remember to charge things. 😂
Seriously though, after reading the ‘Wrapping Up’ part I went and ordered the IP68 sports smartwatch from the list — waterproof is a must. Battery life mentioned sounded optimistic tho — anyone actually getting 5+ days?
I charge mine every other night — less hassle than worrying about dying mid-run. IP68 saved my phone-on-wrist during a surprise downpour last month 🙌
Glad you liked the wrap-up! Battery life varies wildly by model and usage — heavy continuous monitoring, Bluetooth calls, and always-on display reduce it a lot. Some 1.85″ models hit 3-5 days on light use, but two days is more realistic with frequent BP checks. Waterproofing helps for sleep tracking, but remember to dry the contact area well. —admin
I get about 4 days if I disable always-on display and limit call features. Ymmv depending on push notifications and continuous HR sampling.
Loved this write-up — I actually gasped when you described the first calibration 😂
I went cuffless last year with a Hilo-like bracelet and your ‘cuff anxiety’ bit hit home. A few notes from my experience:
– Calibration is real — do it in the same position/time of day for the first week.
– Small movements ruin readings (who knew tapping my phone while walking could do that?).
Quick question for others: how often do you re-calibrate? I was told monthly but sometimes I slack and the numbers get weird. Also, any tips for convincing my doc that wearable readings are “worth a look” (without sounding like I’m into snake oil)? 😊
Totally agree on the movement bit — I started sitting down for 2 mins before reading and it made my readings way less jumpy. Re-calibrate monthly, unless you drop the watch or it gets a firmware update — then do it again.
I recalibrate every 2-3 weeks because I keep switching straps (I’m THAT person). If you can, do a paired reading (wrist watch + upper-arm cuff) once a week for a couple of weeks and show the trend to the doc. Clinicians like graphs > anecdotes.
Thanks Emma — glad the story resonated! I mention monthly re-calibration in the ‘How I Use My Watch Daily’ section, but clinicians often prefer seeing trends rather than single values. If you bring a week of paired cuff + watch readings (mornings and evenings) it helps them see consistency. Also: note the device model and firmware, some clinicians ask that. —admin
Nice article but still a bit skeptical. I mean, I own a Large Cuff Upper-Arm Blood Pressure Monitor With Memory for a reason — it’s a proven tech.
Watches feel convenient but how many times have we relied on novelty gadgets just to get funny numbers? I appreciate the ‘Understanding Accuracy and Limits’ section though — that part was honest.
Also, props for linking to the 1.85″ Bluetooth-Calling Fitness Smartwatch — that one looks like it does everything except make my coffee ☕️
Yeah I keep an upper-arm cuff too. I use the cuff for baseline checks and the watch for in-between monitoring. Think of the watch as a frequent-sampling buddy, not a replacement for diagnosis.
Funny you mention novelty — my aunt bought a smartwatch and stopped using it in 2 months. But if you set it up so it helps with med reminders and trend alerts, it actually becomes useful.
Great point, Daniel. The article tries to balance convenience vs clinical reliability. Upper-arm cuffs remain the gold standard for home monitoring, especially for diagnosis. The watch is useful for frequent trend monitoring and detecting patterns (e.g., nighttime hypertension bursts) but I explicitly note situations where I still use my cuff (post-exercise, inconsistent readings, or medication checks). —admin
If you’re skeptical, try doing a week where you take paired readings (cuff + watch) at same times and log them. Numbers won’t be perfect but trends usually match, which is what matters for day-to-day control.