Why a Bike-Specific Torque Wrench Matters
I explain why controlled torque is central to safe, reliable bike maintenance. Under-torqued bolts come loose, creak, or fail; over-torquing strips threads, crushes carbon, or wrecks components. A general-purpose wrench often lacks the low, precise ranges and feedback bike components require, so a bike-specific approach matters.
My objective is practical: I’ll show how torque works, compare wrench types, list the features I prioritize, explain selecting range, drive size, and accessories, give my step-by-step calibration routine, and share maintenance and real-world tips I use. Read on to choose confidently and keep your bike safe today.


How Torque Works and Why Accuracy Is Critical
What torque actually measures (in plain language)
Torque is the twisting force that tightens a bolt: mathematically it’s force × lever length. In real terms, a torque spec — say 5 Nm for a stem faceplate bolt — tells you how hard to pull on your wrench at its designated length. If you shorten or lengthen the lever (using extensions or the wrong drive), the applied torque changes even if your hand force stays the same. I learned this the hard way the first time I used a long breaker bar on a small 4 mm bolt: the bolt felt “tight,” but I’d doubled the torque.
Why small differences matter on bikes
Bikes use thin-walled alloy and carbon parts where a few newton-meters make the difference between secure and damaged. Over-torque a carbon seatpost clamp by 2–3 Nm and you risk crushing the tube; under-torque a disc rotor bolt and you invite noise, movement, or failure. Manufacturers’ tolerances exist because materials and fastener designs are sensitive — obey them.
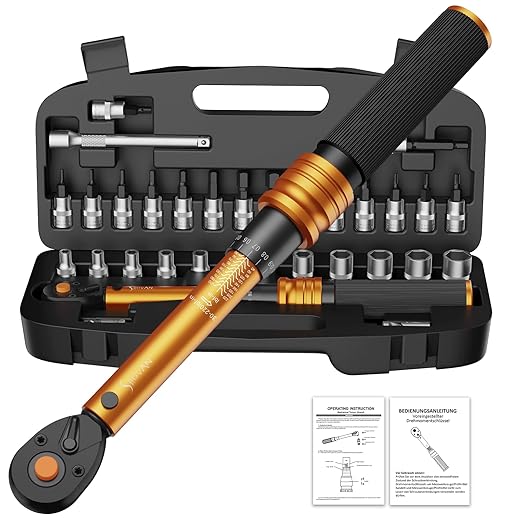
For a compact set that covers most low-range needs, I use the 21-Piece 1/4" Bike Torque Wrench Set.
Units, calibration, and accuracy bands
Next, I’ll compare the common torque wrench types so you can pick the style that matches your practical needs and accuracy expectations.
Comparing Torque Wrench Types: Pros, Cons, and Use Cases
Click-type (ratcheting)
Click wrenches use a mechanical clutch that “clicks” when the set torque is reached. I lean on these in the shop because the tactile feedback is immediate and repeatable.
I use a Park Tool-style click for most on-bike work — when I tighten a 5 Nm faceplate bolt, I trust the click.
Beam-type
Beam wrenches are the simplest: a visible deflecting arm shows torque. No internals to fail.
I’ve used a cheap beam at races and liked that it never needed calibration between weekends.
Preset/torque-limiting (screwdriver-style)
These are set to a fixed torque and release or slip once reached—perfect for repetitive, low-torque fasteners.
Good when you want one-handed, repeatable tightening for hundreds of small bolts.
Digital/electronic
Digital wrenches display torque (and sometimes angle) on a screen with audible alerts.
Brands like Norbar and Wera offer solid digital options that I’ll reach for when I need precision below 1 Nm.
Drive sizes, adapters, and crowfoots
Next up I’ll explain which features I actually prioritize when choosing a bike torque wrench and why they matter in real-world repair work.
Key Features I Prioritize When Choosing a Bike Torque Wrench
Torque range and resolution
For bike work I want a wrench that goes low and fine. Stem caps, hydraulic caliper bolts and many carbon clamp bolts live in the 2–6 Nm band, so a tool that starts at or below 1–2 Nm and clicks or reads in 0.1–0.5 Nm increments is ideal. If a wrench only starts at 5 Nm, it’s useless for many cockpit and brake jobs — I learned that the hard way when over-torquing a stem cap with a coarse tool.
Stated accuracy and tolerance
I look for published accuracy of ±3% or better across the usable range; ±5% is acceptable for casual home use. For digital wrenches I expect ±1–2% if I’m doing pro-level work or warranty-critical torques. Always prefer models that provide an accuracy spec rather than vague marketing terms.
Scale readability and feedback
Clear, laser-etched scales or a high-contrast digital display make consistent tightening faster. For click wrenches I want a crisp, repeatable click I can feel in my palm — that saved me from second-guessing dozens of seatpost clamps.
Reversible heads and drive size
A 1/4″ drive is my day-to-day choice for sub-20 Nm jobs; 3/8″ is useful for larger torque needs. A reversible ratchet head and low-profile adapter help with tight spaces on modern frames.
Ergonomic grip and length
Handle length affects leverage and feel. I prefer a medium-length handle with a nonslip grip that lets me sense the click without excessive wrist motion — long enough for control, short enough for cockpit work.
Audible/tactile feedback and modes
Click, beep, or vibration: I favor tactile click for speed, digital for teaching or when tracking exact numbers. Multiple feedback modes are handy if you work with gloves or noisy environments.
Portability, build quality, warranty, and serviceability
A sturdy carry case, replaceable heads, and a 2–5 year warranty matter. Crucially, choose a brand that offers traceable calibration (ISO/NIST) and straightforward recalibration options — I send mine for annual checks after heavy use.
Quick checklist (use immediately): choose the lowest useful range, demand a clear accuracy spec, prefer 0.1–0.5 Nm resolution, pick 1/4″ drive for most bike work, and confirm recalibration service availability.
Selecting the Right Range, Drive Size, and Accessories for Bike Repairs
Choosing the torque range
I default to a low-range 1/4″ torque wrench that covers roughly 2–20 Nm for nearly all modern road and mountain bike jobs—stem bolts, seatposts, carbon clamps, brake calipers and many derailleur bolts live in that band. That single low-range tool prevents the common mistake of over‑torquing small fasteners with a coarse, higher-range tool.
Drive size: when 3/8″ or larger makes sense
For pedals, crank bolts, bottom brackets or suspension hardware I’ll switch to a 3/8″ or 1/2″ wrench rated for higher torque (30–100+ Nm). The trade-off is clear: larger drives give robustness and less deflection at high torque, but they lack the resolution and low starting torque needed for cockpit/brake work.
Multi-range, split-range, and dedicated low-range tools
Multi-range wrenches promise versatility but often sacrifice low-end resolution or accuracy. Split-range models (two internal gear ranges) are useful if you need one tool to cover both low and mid ranges, but I prefer a dedicated low-range 1/4″ plus a separate mid/high-range 3/8″ for reliability and calibration simplicity.
Accessories I keep on hand
How accessories affect effective torque (and how I compensate)
When an adapter or extension changes the lever arm, applied torque differs. Measure L (wrench length from square drive to center of handle pivot) and e (extension length to bolt center). Use: set_torque = desired_torque × L / (L + e). Example: L=300 mm, e=50 mm → set = desired × 300/350 ≈ desired × 0.857. Avoid angled crowfoots; keep tools in-line or re-calc. For torque adapters and rotating bit holders I assume small error and either verify with a quick calibration or avoid for critical warranty bolts.
Next I’ll show exactly how I verify calibration and run a quick check routine before important jobs.
My Step-by-Step Calibration and Verification Routine
I treat calibration as a short ritual before any critical job. A few minutes of verification gives me confidence that a torque setting will protect carbon and prevent stripped threads. Below is the routine I use in my shop.
Setup: tools and test rig
I prefer a calibrated torque tester (Norbar, CDI, or a Park Tool test rig) mounted to a bench. If you don’t have one, a rigid lever arm and a reliable scale work (see “quick check” below). Make sure the wrench, tester and room are near the same temperature—cold metal reads differently.
Warm-up and baseline
I set the wrench to mid-range, cycle it 10–15 times (no load), and let it settle for a minute. This warms internal parts and clears any initial stickiness. For digital wrenches I also check firmware/battery and zero the display.
Measurement routine
I test three setpoints: low (≈20% of range), mid (≈50%), and high (≈90%). At each point I take five independent applications and record the results.
Compute the mean and spread (max–min). Compare the mean to the manufacturer tolerance (check the manual). Good tools typically stay within a few percent; confirm the spec for your model.
Interpreting results and what I do if it’s out of spec
If deviation is within spec: I log the date and move on. If it’s marginal, I repeat after re-warming and re-test.
If it’s clearly out of spec:
Safety checks and tips for wrench types
Quick verification without specialized gear
Mount a 300 mm straight bar on the drive, pull perpendicular using a bathroom scale: Torque (Nm) ≈ Force (N) × 0.3 m. Multiply scale kg × 9.81 for newtons. It’s crude but catches big errors.
Next, I’ll cover maintenance, storage and the everyday habits that keep a torque wrench accurate and ready.
Maintenance, Storage, and Real-World Usage Tips I Rely On
Daily storage and care
I always set my click wrench back to its lowest setting before stowing it, wipe it dry, and keep it in a padded case away from humidity and corrosive cleaners. A single fall changed the feel of a once-perfect click, so I protect mine with a foam tray or a toolbox drawer to prevent drops and bangs.
How often I recalibrate (and when to accelerate it)
For home use I recalibrate or verify annually. In a busy shop I shorten that to every 3–6 months or every ~5,000 cycles. I also send a wrench for lab calibration immediately after a hard drop, a suspicious reading, or any repair where traceable accuracy is required.
On-bike technique for consistent results
I hold the wrench at the handle centerline, elbow tucked, and pull smoothly straight back—no jerks or body torque. I aim for a linear pull at 90° to the handle; twisting or angular pulls change the effective lever arm and cause under- or over-torque. For delicate carbon parts I use a slow, steady approach so the click or digital peak is unmistakable.
Crowfoots, adapters, and safe math
I avoid crowfoots unless necessary. If I must use one that increases effective length, I either:
Troubleshooting checklist
Budget and workflow pragmatics
I own two wrenches: a 1/4″ low-range for cockpit/seatpost work and a mid-range 3/8″ for cranks/axles. That cuts setting changes and downtime when one is in for calibration. If you rely on torque every ride, factor in calibration costs ($50–$150) as a recurring tool expense.
Next, I’ll wrap this up with final thoughts and a buying checklist.
Final Thoughts and a Practical Buying Checklist
I prioritize a low-range, accurate, serviceable wrench, verify calibration before use, and maintain consistent technique and storage to protect accuracy. A reliable tool saves parts and gives confidence at the bench.
Checklist I use when buying: correct low torque range, stated accuracy (±3% or better), appropriate drive size, clear tactile/visual feedback, and easy calibration/service options. Test calibration on arrival and recheck periodically. Buy quality and you’ll thank yourself during every ride and weekend.

Random thought: the article didn’t mention carrying a small torque checklist in the saddlebag for racers. I keep a laminated card with the key torques (stem, seatpost, brake calipers). Super handy when swapping wheels/equipment.
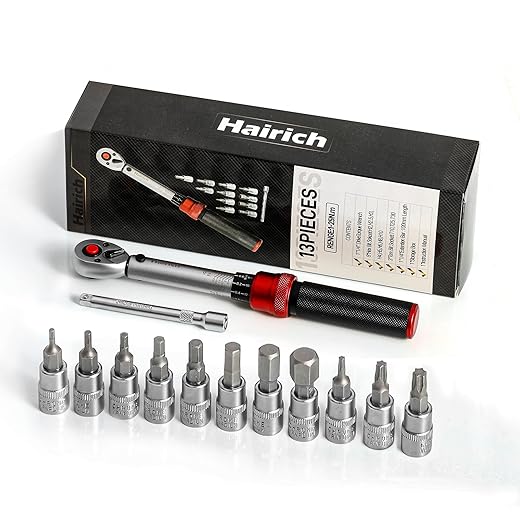
Also, the Hairich 13-Piece option is cheap — anyone compared it to HYCHIKA?
I haven’t compared directly, but Hairich felt a hair cheaper in material. For a backup set it’s okay, but for daily use I’d pick HYCHIKA or LEXIVON.
Love the laminated card idea. Hairich is budget-friendly; HYCHIKA usually has slightly tighter tolerances in my checks.
I use a sticker on the underside of my stem with torque numbers. Cheap and unobtrusive.
I keep digital notes too, but the physical card is genius — no phone battery worries mid-ride.
Great write-up — finally someone explains torque in plain English. I bought the HYCHIKA 13-Piece kit last year and it’s been fine for my road bike. The article’s calibration routine helped me find a small drift in my wrench.
Two quick questions:
1) How often do you recommend checking calibration if I use it weekly?
2) Any preference between the HYCHIKA and the LEXIVON sets for long-term reliability?
Glad it helped, Emma! I check mine every 2–3 months with the verification routine, or sooner if it takes a knock. Between HYCHIKA and LEXIVON I leaned toward LEXIVON for build finish, but HYCHIKA is a great value.
I do monthly checks because I ride a lot and tbh it gives me peace of mind. Same two brands as choices — congrats on the find!
I check mine before any race or long ride — paranoia ftw 😅. Also, LEXIVON felt nicer in hand but HYCHIKA has the small accessories I liked.
I think the author could’ve gone deeper into digital torque wrenches. They talked about them but kinda glossed over battery life and calibration drift. I’m tempted by a digital unit but worried about long-term reliability. Any users of digital wrenches (not the cheap ones) chime in?
Agree — long-term reliability of digital units varies. Higher-end digital tools are great for repeatability, but battery checks and periodic verification are important. If you want absolute simplicity, a good clicker is lower maintenance.
Got a small cheap digital for <$100 — it died in a year. Spent more on a better one and it's been solid for three years so far. You get what you pay for.
Digital logs are ace for workshop pro work. For home use, I’d stick with clickers unless you need the data.
One add: keep spare batteries in your bench kit if you go digital — don’t let battery failure cancel a repair.
I had a mid-range digital that worked well for 2 years, then started drifting — calibration fixed it though. If you’re tech-savvy, digital is fantastic for logging.
This is a super realistic discussion but tbh I’m overwhelmed by kit counts (13, 15, 21, 33 pieces etc.). For a casual home mechanic who only services brakes, wheels, and a headset, is a 13-piece like HYCHIKA enough? I don’t want to overbuy.
For brakes, wheels, and headset, a 13-piece 1/4″ kit is usually enough. Focus on drive size and the low-end torque range rather than number of pieces. Accessories are nice but not necessary.
Agree with admin. Start small and then add specific sockets/bits as needed. No point in lugging 33 pieces if you never use them.
Big thanks for the calibration steps. I was intimidated by the process, but the article made it approachable. I used the 33-piece bike kit for a friend’s bike tune and double-checked everything after reading the article. All good. 👍
You’re welcome! Happy it demystified it — calibration doesn’t need to be scary.
Nice! Also: remember to store the wrench at its lowest torque setting when not in use — it prolongs the mechanism life.
Pro tip: put a thin strip of tape on bolts you torque so you can quickly see if anything moved after a short ride.
Small rant: lots of cheap torque wrenches on Amazon have misleading accuracy specs. The article nailed how accuracy bands work. I returned a branded one because it was off by ~15% at the low end.
Anyone else had bad luck with Amazon listings vs actual performance?
Yep, that’s why I emphasize verifying on arrival. The verification routine can catch those out-of-spec surprises before you strip something.
Same here. Bought a no-name set that felt flimsy and read high. Lesson learned: test immediately and keep packaging for returns.
Really helpful guide. One tiny nitpick: the author suggests storage in a case, but some of the Amazon kits (33-piece 1/4″ kit) have flimsy plastic cases. Maybe mention a separate padded roll?
Otherwise, loved the practical buying checklist — short, usable, and not pushy.
For me a padded tool roll is easier to stash in a workshop drawer. Less shelf space than a rigid case.
Good point about cases — I added a note to prefer hard foam inserts or a padded roll for frequent transport. Cheap plastic clamshells are okay for home-only storage.
I’ve swapped kit cases into a Pelican-style insert — overkill but my tools are safe.
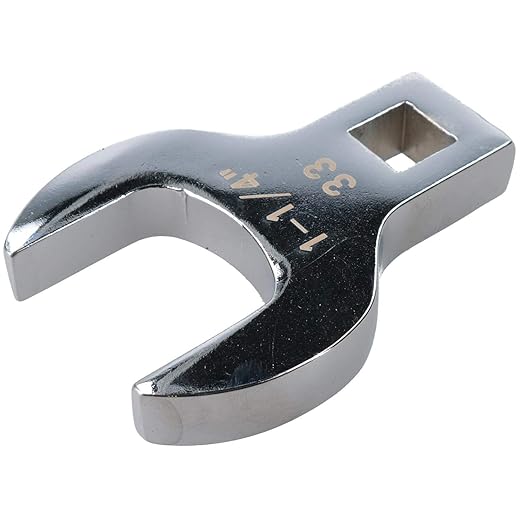
Loved the checklist at the end — practical and short. I do have a follow-up: the article mentions crowfoot sockets (the 33mm 1/2″ drive crowfoot) for awkward bolts. Anyone used those on a seatpost clamp? Does the torque transfer well or is it sketchy?
Also, the maintenance tips were really useful (especially the storage humidity bit).
Short answer: fine for big bolts, meh for small torque-critical stuff. Seatpost clamps are borderline — depends on the clamp design.
Used a 33mm crowfoot on a tapered headset nut once — it was fine, but I double-checked with a beam gauge. If you need precision, go with a direct socket on the proper drive size.
If you have the 33-piece kit, it sometimes includes adapters that make it easier without using an actual crowfoot. Worth checking.
Also FYI, crowfoots can introduce geometry issues if they’re at an angle. Been bitten once — now I try to avoid them for anything under 20 Nm.
Crowfoots work but you lose the angle and some torque accuracy if there’s any offset — use only short crowfoots and reverify torque on a sacrificial bolt. For seatpost clamps I’d rather use a proper 1/4″ torque wrench + adapter if needed.
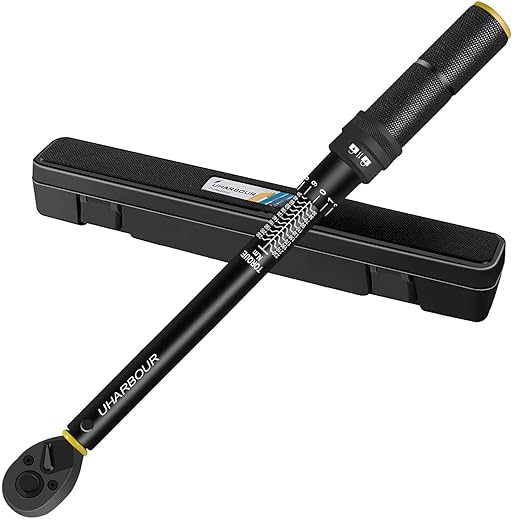
Fun read. Also: for heavy-duty weekend mechanics, the 1/2″ Drive 20–230 Nm automotive torque wrench has its place for crank bolts or bottom brackets. Don’t bring it to a carbon cockpit though 😂
Exactly — use the right tool for the job. That automotive wrench is great for high-torque drivetrain jobs, not cockpit bits.
Short and sweet: LEXIVON 15-piece here, feels solid. One caveat — the ratchet’s reversal click is a bit stiff when cold. Anyone else notice temperature affecting their wrench feel?
Yes, temperature can change feel — lubricants thicken and materials contract slightly. Let it acclimate and warm it in your hands for a few minutes before critical torquing.
Okay, amateur question: the article’s step-by-step verification uses threaded test bolts. Where do you source bolts that mimic head unit torque behavior? Don’t want to mess up a nice screw.
Just a silly comment: the author’s note about not ‘winging torque’ should be on everyone’s forehead. Had a friend strip a carbon seatpost once — not pretty.
Also, I liked the humor scattered through the guide. Kept my attention lol.
LOL ‘Don’t Torque Like Dave’ — my new bike club motto.
We should have a ‘Don’t Torque Like Dave’ PSA.
Stripped carbon is the worst. It’s like watching a slow-motion crime scene.
Thanks! Glad the tone worked. And yep — torque discipline saves friendships and seats 😂
I appreciated the pros/cons section comparing clicker vs beam vs digital. I personally went with a mid-range 21-Piece 1/4″ set because I wanted accessories and a decent head unit. So far: reliable for brake caliper bolts, but I avoid it for carbon clamps unless the torque is <10 Nm.
Also: pro tip — mark the wrench head with a Sharpie after calibration so you know when it was last checked. 🙂
I like the 21-piece for the insert sizes. If you’re doing more than brakes you’ll want the little bits for derailleur clamp bolts too.
Photo log + Sharpie + calendar reminder = calibration trifecta. Works every time.
Great tip about the Sharpie. I also keep a simple log in my phone with calibration dates and any adjustments.
Ooh Sharpie idea is smart. I use tape with dates — looks neater on the bench 😂
Agree on avoiding carbon clamps — good article note. I once overtightened a carbon clamp by accident and the guilt still haunts me.
I do the tape-date thing too. Also, lazy but effective: snap a quick calibration photo and store it in a dedicated album.
Nice breakdown of drive sizes. I still don’t see why anyone would bring a 1/2″ drive for bike bolts unless they’re doing suspension or crank bolts? The 1/2″ 20–230 Nm automotive wrench seems massive for bikes.