Can You Use Smart Plugs Outdoors? A quick primer
You likely want the convenience of scheduling and remote control for your outdoor lights, but you may wonder if smart plugs belong outside. Not all smart plugs are safe outdoors. Using the wrong device can cause electric shock, short circuits, or permanent damage to the plug and your lights.
This article shows how to pick a true outdoor-rated smart plug by explaining weatherproof and safety ratings, load limits, and proper installation. You will also get tips on placement, wiring safety, connectivity range, and maintenance so your lights stay reliable and safe in all seasons. Read on to learn what to buy, how to install it safely, when to call an electrician.


Understanding the difference between indoor and outdoor smart plugs
Why indoor plugs aren’t interchangeable with outdoor models
You might think a plug is a plug, but outdoors is a different environment. Rain, sprinklers, dust, insects, and temperature swings all attack electrical components. An indoor smart plug left on a porch or under eaves can let moisture creep into contacts, corrode metal, bridge circuits and cause short circuits or blown internal fuses. I’ve seen holiday light setups stop working after a single wet storm because the plugged-in controller wasn’t sealed for outdoor use.
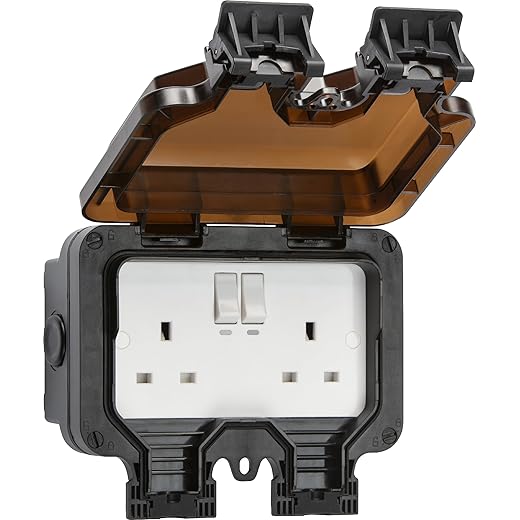
What outdoor enclosures do differently
Outdoor smart plugs are designed to keep water and debris out and to survive sun and cold. Look for these features:
Products like TP-Link’s outdoor models and Wyze Outdoor Plug are built with those protections, whereas common indoor units (for example, basic Kasa HS103-style plugs) lack them.
Common failure modes when you use an indoor plug outdoors
Quick checklist you can use immediately
Understanding these physical differences helps you pick a device that won’t fail or create a hazard when you put your lights outside.
How to read weatherproof and safety ratings for outdoor use
When you’re choosing a smart plug for your porch, garden, or pathway lighting, the labels on the box are your best guide. Here’s a practical way to decode them so you buy something that will survive real-world weather, not just a product photo.
IP (Ingress Protection) ratings: the basics
IP ratings have two digits: the first is solids (dust/insects), the second is liquids (water).
Real-world minimums:
A quick rule: if your plug will face open rain or sprinklers, aim for IP65 or higher.
UL, ETL and “wet location” listings
Look for UL or ETL listing numbers and phrases like “Suitable for Wet Locations” or “Indoor/Outdoor Use.” A listing means a third-party lab tested the unit to safety standards — don’t rely on marketing copy alone. If the spec sheet shows the listing number, you can verify it on the certifier’s website.
NEMA and enclosure ratings
For full electrical enclosures you may see NEMA ratings:
Temperature range and extra markings
Check operating temperature (e.g., -20°C to +50°C). If you live in harsh winters or intense summer heat, pick a wider range. Also look for “UV-resistant,” “corrosion-resistant contacts,” wiring gauge, and downloadable spec sheets so you can verify claims.
Quick checklist: IP rating, wet-location UL/ETL listing, NEMA or enclosure spec (if applicable), operating temp range, and a verifiable spec sheet. Next, we’ll apply these checks to pick the right model for specific outdoor lighting setups.
Choosing the right smart plug for your outdoor lighting setup
Match the plug to the actual load
Before you buy, total the wattage of everything the plug will control, then convert to amps: Amps = Watts ÷ Voltage (U.S. mains ≈ 120V). For example:
Many consumer outdoor smart plugs are rated for 10A (≈1200W) or 15A (≈1800W). Pick a plug with at least 25–30% headroom above your calculated load, and double-check for any listed “inrush” or motor ratings if your lights use transformers, power supplies, or motors.
Dimmers, LED drivers and transformers
If your fixtures are dimmable, or run on low-voltage LED drivers/transformers, standard on/off smart plugs may not play well.
A real-world note: someone controlling low-voltage landscape lighting with a basic outdoor plug found the lights flickered or tripped the plug on startup — upgrading to a relay designed for inrush solved it.
Plug-in vs. hardwired solutions
Choose plug-in when lights are temporary (holiday strings, portable lanterns). For permanently wired fixtures or dedicated circuits, use a hardwired outdoor smart switch or an in-line relay module (e.g., Shelly 1/1PM-style devices installed in a weatherproof box) installed by a qualified electrician.
Features and buying tips
Safe installation and placement practices for outdoor smart plugs
When you move from choosing a device to actually installing it, small choices make the difference between a trouble-free season and soaked, tripped circuits. Below are step-by-step, practical tips to keep cords, plugs and your home safe.
Pick a protected mounting location
Mount your plug where it stays sheltered from rain and direct hose spray—under eaves, porch ceilings, or inside a purpose-built weatherproof box. Keep the outlet at least 12–18 inches above ground to avoid puddles and snow drifts. If you hang holiday lights, secure the plug to a hook or bracket rather than letting it rest on soil or mulch.
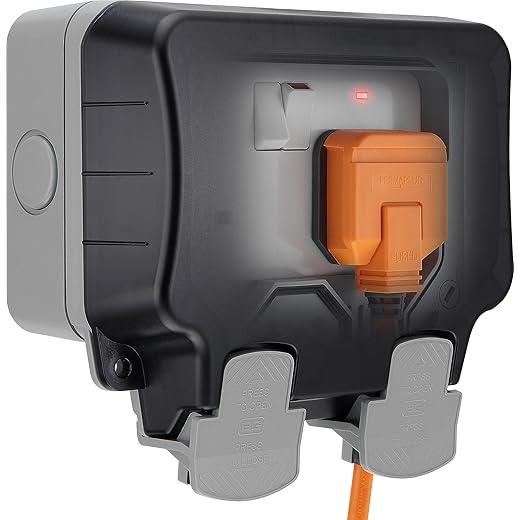
Use the right cords and enclosures
Only use extension cords and enclosures rated for outdoor use (look for outdoor/UV-rated, SJTW or equivalent). For semi-permanent setups, mount a weatherproof in-use (bubble) cover or an IP-rated junction box so the smart plug and its connections stay dry.
GFCI and circuit practices
Always plug outdoor devices into a GFCI-protected receptacle. If your outdoor outlet isn’t GFCI, have one installed or use a portable GFCI interrupting device. For permanent fixtures or high loads, choose a hardwired weatherproof switch or have a licensed electrician install a dedicated GFCI-protected circuit.
Route cables to avoid hazards
Run cords along walls, under gutters, or through purpose-made cable clips—never across walkways. Keep cables sloped so water drains away from the plug and avoid low spots where water can pool. Seal any penetration where a cord enters the house with a proper exterior-grade cable gland or silicone caulk.
Temporary vs permanent and seasonal notes
For short-term décor, use a plug-in rated for outdoor temporary use. For year-round lighting, invest in a permanent, hardwired solution installed by an electrician. In winter, elevate plugs above snow depth; in summer, shade cords from intense sun to reduce UV degradation.
These practical steps will reduce failure and safety risks as you deploy outdoor smart plugs.
Connectivity, control and range considerations outdoors
Wi‑Fi and Bluetooth limits
Outdoors sounds easier—fewer walls—but real-world performance varies. 2.4 GHz Wi‑Fi has the best outdoor reach (line-of-sight often 100–300 ft), while 5 GHz drops off faster. Bluetooth/BLE usually tops out around 30–60 ft. Thick siding, brick, metal gutters or foil-backed insulation can cut signal dramatically; one reader’s porch light failed when the plug sat behind aluminum siding. Plan for that loss, not ideal numbers.
Placement and extending coverage
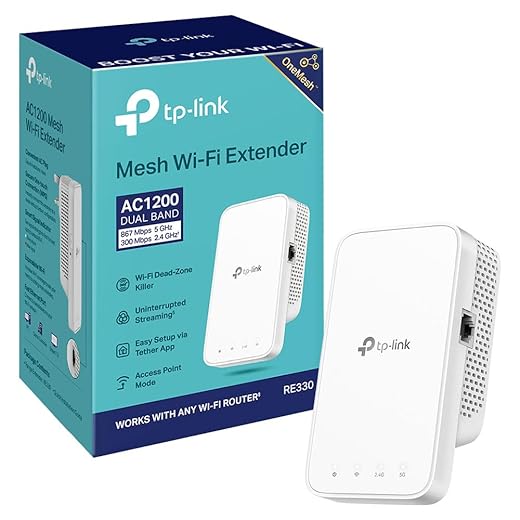
Place the smart plug where it can “see” your router or a node, ideally elevated and away from metal. If coverage is marginal, use mesh extenders or a dedicated outdoor access point.
Examples: mesh systems (Eero, Google Nest WiFi, Netgear Orbi) give seamless outdoor reach compared with a single range extender. Tip: put the extender inside near the exterior wall rather than in a basement to improve outdoor coverage.
Zigbee and Z‑Wave hubs
If you already have a Zigbee/Z‑Wave network, an outdoor smart plug that uses those radios can be far more reliable than Wi‑Fi. Hubs like SmartThings or Home Assistant gateways let low‑power radios form robust meshes—each compatible device extends range. Consider battery-backed repeaters (some smart switches act as repeaters) to strengthen the mesh.
Remote control and cloud vs local
Cloud control makes remote access easy but adds latency and privacy exposure. Local control (via a hub or Home Assistant) is faster and keeps schedules working during internet outages. Choose devices that offer both modes if you want flexibility.
Power interruptions and backups
If schedules are critical, plug your router/hub into a small UPS so brief outages don’t break automations. For solar or off-grid setups, a DC‑to‑AC inverter or purpose-built battery backup preserves connectivity.
Security checklist
Next up: maintenance and troubleshooting techniques to keep those lights reliable season after season.
Maintenance, troubleshooting and safety checks to keep lights reliable
Regular inspection checklist
Make visual checks part of your routine—monthly in active seasons, quarterly otherwise. Look for:
Test GFCI and electrical safety
Test any GFCI-protected outlet monthly: press “Test” then “Reset” to confirm trips and restores power. If your smart plug sits on an external GFCI circuit, a failed reset or repeated nuisance trips indicates wiring or moisture problems—don’t just tape it over.
Firmware, credentials and network hygiene
Keep plug firmware current (check the app monthly). Rotate Wi‑Fi passwords yearly and keep IoT devices on a segmented network. Back up hub configurations if supported; that saves time if you need to factory-reset a device.
Troubleshooting common problems
Intermittent connectivity: move the plug a few inches, check router logs, or add a mesh node. Nuisance trips: reduce connected wattage or replace LED strings that have high inrush current. Overloads: calculate lamp wattage; if your string draws near the plug’s max, upgrade to a higher-rated outdoor socket.
Seasonal tasks and storage
Winterize by removing temporary plugs for storage, or insulate them with weatherproof covers and silicone-safe sealant. Before storing, wipe dry and test indoors. For holiday lights, label cords and test each set before reinstallation.
When to repair or call an electrician
Replace a device immediately if you see cracking, persistent moisture, scorch marks, or failed GFCI tests. Call a licensed electrician for repeated trips, visible arcing, or if the problem is in fixed wiring.
Storm, lightning and surge safety
Unplug outdoor smart plugs during severe storms when possible. Protect your router and hub with a UPS and install a whole‑home surge protector for best defense against lightning-induced surges.
Next up: the final verdict on using smart plugs safely with your outdoor lights.
Final verdict: using smart plugs safely with your outdoor lights
In short: you can use smart plugs outdoors, but only when you select units designed and certified for exterior use and follow correct installation. Pay attention to IP and NEMA ratings, load limits, secure weatherproof housings, proper outlet placement, and reliable connectivity. Use GFCI-protected circuits, avoid permanent exposure to standing water, and match plug capacity to lighting fixtures to prevent overloads and failures.
When in doubt, prioritize weatherproof certifications or consult a qualified electrician. Regularly inspect seals, updates, and connections to keep your setup reliable. Follow the article’s guidance and you’ll enjoy smart, convenient outdoor lighting without compromising safety — start by picking the right rated plug for your project.