Why We Go Ultralight (And Why You’ll Grin on the Trail)
Ever wonder how much happier a lighter pack makes us? We’ll show you: fewer pounds mean more miles, fewer blisters, and extra room for snacks. We admit the fears—will we be cold, hungry, or sorry?—and promise a practical playbook that balances safety, comfort, and the odd ounce-saving thrill.
This guide walks us through our philosophy of Less Is More (Mostly), choosing a pack that fits and forgives, clothing and layering to wear instead of carry, the shelter and sleep equation, lightweight food, cooking, and hydration, and clever packing techniques, quick repairs, plus a real-world checklist so we can pack smart and hike happy. Ready? Let’s go lighten our loads.


Our Ultralight Gear Philosophy: Less Is More (Mostly)
Base weight targets (real talk)
We aim for base weights that actually fit real trips—not clickbait numbers. For most of us, a 6–12 lb (2.7–5.5 kg) base weight keeps things light without courting misery. Super-ultralight (sub‑5 lb) is awesome if you accept trade-offs; heavier winter or long‑food trips will push toward the upper end.
Prioritize safety and redundancy
Light doesn’t mean reckless. We never skimp on:
Embrace multi-use gear and smart trade-offs
Our favorite wins come from gear that pulls double-duty—trekking poles that become tent poles, a buff that’s sunshade, pillow and bandage, or a titanium spork that replaces bulky cutlery. Trade comfort for ounces where it makes sense (replace a 20 oz cookware set with a 6 oz pot if you can cook similarly).
A simple decision framework
Ask three questions before an item boards your pack:
Durability vs. featherweight
Featherweight fabrics are tempting, but we judge by use-case: if the item will see rough ground or lots of abrasion, choose slightly heavier, repairable materials (think Dyneema vs. ultralight ripstop for a frequently used pack). Carry a tiny repair kit—zip ties, duct tape, sewing kit.
Psychological hurdles (and how we beat them)
We’ve all packed a third toothbrush “just in case.” Counter that with prompts: simulate a short trip carrying your pared kit, or make a “just-in-case” stash at home. Laugh at past ridiculous items (yes, the inflatable neck pillow) and keep a short list of items we rarely ditch: headlamp, shelter, water treatment, first-aid, and a reliable sleeping system.
Next up: choosing the right ultralight pack—fit, features, and forgiveness matter more than a headline weight.
Choosing the Right Ultralight Pack: Fit, Features, and Forgiveness
Picking a pack is part science, part seat-of-pants testing. We want something that matches our body, trip, and tolerance for fiddling. Here’s how we narrow it down without buying every shiny ultralight bag in the shop.
Pack types — when to pick what
Capacity vs. volume — estimate the liters
A quick rule:
Fit fundamentals
Features to prioritize (and what we ditch)
Prioritize:
Ditch:
Quick mods and troubleshooting
We test in short hikes before committing—if it makes us grin on mile three, it’s a keeper.
Clothing and Layering: Wear It, Don’t Carry It
The core kit
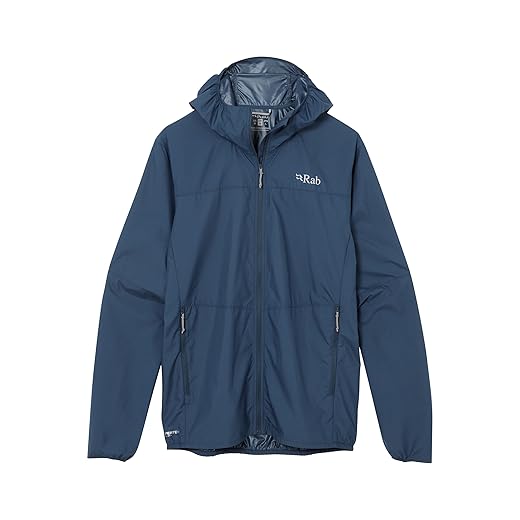
Our clothing rules are simple: wear what you can, carry only what you must. We build around four pieces: a breathable hiking layer (light long sleeve or tee), one insulating layer for camp (puffy or lightweight fleece), a waterproof/breathable shell, and a slim sleep layer. Add one extra pair of socks and underwear—no more. When weight matters, one versatile puffy (e.g., 7–10 oz) beats two bulky midlayers.
Fabrics — synthetic vs merino
Synthetic: fast-drying, rugged, cheaper, dries on the trail after a creek fording. Great for high-sweat hikers.
Merino: better odor control, more comfortable next-to-skin, but pricier and slower to dry. We often pick merino for base layers and socks (Darn Tough, Smartwool) and synthetic for outer/hike layers.
Dressing strategy — hike warm, camp cozy
Hike warm: start slightly warm and ventilate—zippers, sleeves, hat off. Camp cozy: put on your insulating layer as soon as you stop; wearing the puffy during breaks saves ounces because we don’t pack a second “rest jacket.” Swap layers strategically: wear the rain shell for a hard, cold descent rather than carrying it unused.
Footwear choices
Trail runners (Altra Lone Peak, Salomon Ultra Glide) = light, fast, breathable—our default for dry, non-technical trails. Boots (La Sportiva Nucleo High II, Lowa Renegade) = ankle support and protection on rocky, wet, or heavy-load terrain. Pick one pair and a thin camp shoe (crocs or sandals) only on hot, car-camping exits.
Hygiene, repairs, and tiny comforts
Keep odor down: rinse base layers, air at night, use merino where possible. Pack a tiny repair kit:
We still laugh about the time one sock was left at home and our foot learned the cost of optimism—never trust a drawer. Next up: how to sleep light without freezing—our shelter and sleep systems choices.
Shelter and Sleep Systems: The Sleep Equation
Shelter choices: tent, tarp, or bivvy?
We pick shelter by route, weather, and party size. Tents buy bug and weather protection with easy setup for solo or pairs (think: consistent rain or windy ridgelines). Tarps win on weight and versatility for dry-season routes and experienced campers. Bivvies are smallest but offer minimal weather forgiveness—great for fastpacking or summer alpine nights. Consider setup time: a fiddly tarp in wind equals a sleepless night.

Insulation: pads, R-value, and sit pads
Your pad is the unsung hero. R-value measures ground insulation; pick based on temps, not ego. Use:
Sleep systems: quilts vs sleeping bags
Quilts and top quilts shed zipper bulk and weight by relying on your pad for underside insulation (Enlightened Equipment, Katabatic examples). Choose a quilt if you sleep mostly on your back or use a reliable pad; choose a mummy bag when you need consistent full-encasement warmth or share a tent with variable sleepers. Pro tip: match quilt warmth to your pad’s real R-value, not the advertised one.
Stakes, guylines, and footprints
Light stakes (aluminum, 2–4 oz) + reflective thin guylines save wind drama. Skip a heavy footprint: use no-footprint strategies on durable ground or cut a lightweight Tyvek patch for longevity. Replace sewn-in guylines with removable beak knots to save repairs.
Condensation and repairs
Vent your shelter each night, cook downwind, and orient openings to airflow. Pack a tiny shelter repair kit:
Choosing the right combo of shelter and pad means we sleep more and carry less—next up: we’ll show how to pack and kit these items like pros.
Food, Cooking, and Hydration: Eat Well, Pack Light
Calorie-first meal planning
We plan meals by calories-per-ounce, not chef-ego. For day trips or fastpacks, shoot for compact, calorie-dense foods; for multi-day trips, aim to average your typical burn (often 2,500–4,000 kcal/day for moving hikers). Mix a high-calorie dinner with lighter breakfasts and extra snacks for afternoon climbs—this keeps pack weight down without leaving us hangry.
Stove systems & minimal cookware
Choose a stove by reliability and fuel availability: canister (Jetboil Flash, MSR PocketRocket) for fast boils; liquid-fuel for extreme cold and long trips; alcohol or solid-fuel for simplicity and cheap weight; or cold-soak to skip fuel entirely.

Keep cookware pared: 700–900 ml pot, titanium or hard-anodized aluminum, one spork, and a small 6–8 oz mug that doubles as a bowl. A stuff-sack cozy reduces fuel boil time and protects gear.
Hydration tactics
Filter (Sawyer Mini, Katadyn BeFree) = fast, light, reusable. UV (SteriPEN) = chemical-free but needs batteries. Chemical (Aquamira, iodine tablets) = light and tiny, but taste and dwell time matter. Boiling = foolproof, fuel-dependent. Use collapsible reservoirs (Platypus, HydraPak) for ounce-savings and filling convenience; carry a rigid bottle (SmartWater or Nalgene) if you need a backup or want to melt snow.
Snack & resupply strategy
Pack snacks that punch above their weight:
Plan resupply every 3–5 days on longer routes, or arrange town drops/mail drops to keep daily pack weight low.
Simple tasty swaps & emergency rations
Swap instant mashed potatoes for couscous for faster cook time; powdered cheese adds fat and flavor. Quick recipes: couscous + tuna + olive oil + dried herbs; instant rice + miso + tofu jerky. Emergency rations we’ll actually eat:
Packing Techniques, Repairs, and a Real-World Checklist: Pack Like a Pro
Weight distribution: heavy and central, light and peripheral
We pack heavy items (water reservoir when full, food for the next 24–48 hours, stove) close to our spine and between shoulder blades. Light, compressible items (clothing layers, sleeping quilt) sit low and toward the hipbelt so the weight rides on our hips. Think: core load centered; fluff on the edges. We once learned the hard way that a single heavy camera in a hip pocket ruins a summit selfie and our backs—don’t be like us.
Compression, access, and “daily” layering
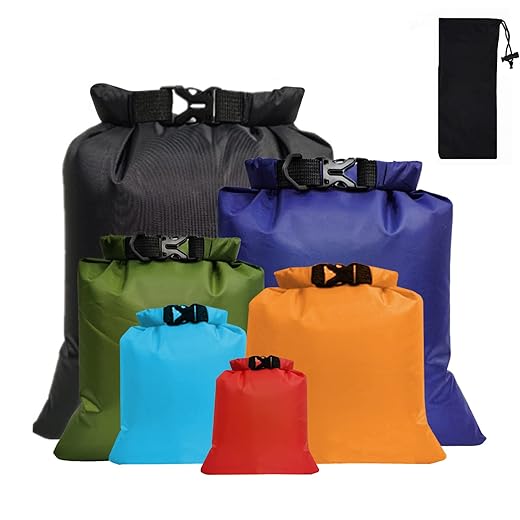
Organize for the day: top lid or front pocket = rain jacket, map, snacks, headlamp. Middle torso = shelter, stove; bottom = sleep system. Use small stuff sacks for separation (clothes, cook kit, toiletries) and compression straps to flatten that load into a tidy cylinder.

Outside-carry decisions
Exterior attachment = bulky, wet, or quick-access: trekking poles, crampons, tent poles, packraft. Use lightweight straps and stowable daisy chains; if it flaps, it’s costing energy. We favor pocketed hipbelts (for snacks) over external hip attachments that snag on brush.
Tiny repair & first-aid kit (our go-to)
Keep everything in one tiny waterproof bag—multiply functions, minimize drama.
Site-selection, food security, and hauling
Pick a flat, well-drained site near water but out of sight lines. For bears, we hang food 15–20 ft up and 10–15 ft out from trunk, or use an Ursack (we love the Ursack Major S) and cinch it under a rock-away. Pack out trash in resealable bags.
Pre-trip checklist + one-night shakeout
Next up: final thoughts and our parting pack wisdom.
Hit the Trail: Our Parting Pack Wisdom
Ultralight packing is iterative—start small, test, and adjust. We’ll remind you that safety and enjoyment beat obsessive ounce‑counting; every ounce saved is an excuse for one more bite of trail chocolate. Try one change per trip, note what worked, and don’t be afraid to keep the comfort items that keep you smiling.
Use checklist, experiment with gear configurations, and share your victories and hilarious failures with us. We’ll laugh, learn, and trim together—because the best pack is the one that gets you out on the trail, smiling and ready for the next mile.