Why winter moisture matters for your earbuds
Winter brings cold air, humidity, snow, and condensation — all threats to your earbuds and charging case. Small vents, tiny speakers, and metal contacts make earbuds especially vulnerable to moisture, which can cause muffled sound, intermittent connection, corrosion, and reduced battery life. Act quickly: early checks and simple steps often prevent permanent damage.
This article shows you how to spot the signs, build simple daily habits, choose the right cases and moisture absorbers, and perform quick safe drying when water gets in. You’ll also get long-term maintenance tips and guidance on when to repair, replace, or file a warranty claim. Follow these easy fixes to keep your audio clear all winter.
Stay prepared today.
Spot the signs: how to tell if moisture is affecting your earbuds
Common symptoms to watch for
You should notice problems early if you know what to look for. Typical signs of moisture intrusion include:
A quick real-world example: you step inside from a snowy walk and one AirPods Pro sounds muted while the other is fine — that asymmetry often points to moisture in one bud.
Quick diagnostic checks you can do in minutes
These quick checks tell you whether the buds, the case, or a software hiccup is to blame, which helps choose the right next steps.
Simple daily habits to prevent winter moisture build-up
Prevention is the easiest, cheapest protection for your earbuds. Adopt a few small habits and you’ll avoid most winter moisture headaches — muffled sound, corroded contacts, and stray condensation.
Pocket choice and temperature handling
Keep your earbuds and case inside an inner jacket pocket or a zipped interior bag instead of an outer pocket. That extra layer reduces exposure to wind-driven snow and big temperature swings. When you come indoors, don’t shove a cold, wet case straight into a warm pocket, car heater, or on a radiator — the abrupt change creates condensation inside the case and on drivers. For example, AirPods Pro and Sony WF-1000XM4 users often spot fogging after moving from subzero air into a heated office; give them a few minutes to acclimate before using or charging.
Use and outdoor behavior
Avoid wearing earbuds in heavy snow or sleet; over-ear headphones or a zipped hood can keep both you and your gear drier. After any outdoor use, wipe the earbuds, tips, and case exterior with a soft microfiber cloth. Quick checklist:
Gym and commute routines
After workouts, towel off earbuds and store them separately from damp gym clothes — a small zip pouch or dedicated pocket prevents moisture transfer. For daily commutes, keep a spare microfiber cloth and a small silicone squeeze bulb (to clear earwax + water) in your bag. When you get indoors, air-dry at room temperature or use a gentle fan; avoid hair dryers or direct heat sources that can warp plastics or push moisture deeper.
Next up: pick the right accessories — cases, covers, and absorbers that reinforce these habits.
Pick the right accessories: cases, covers, and moisture absorbers
The right accessories add a layer of protection without changing how you use your earbuds. Pick tools that stop water and humidity before they reach delicate electronics.
Understand IP ratings and what they actually mean
IP codes have two digits: solids (dust) then liquids (water). IPX4 resists splashes from any direction; IP67 survives temporary submersion (1m). For most winter use — snow, sleet, sweating — IPX4–IPX5 is enough. Higher ratings matter if you ski in wet slush or work outside in heavy precipitation. What IP doesn’t cover: internal condensation from sudden temperature shifts, charging-port corrosion, or damage from repeated immersion beyond the rating.
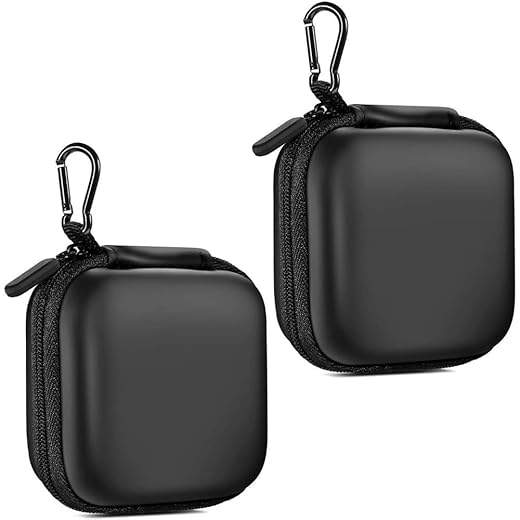
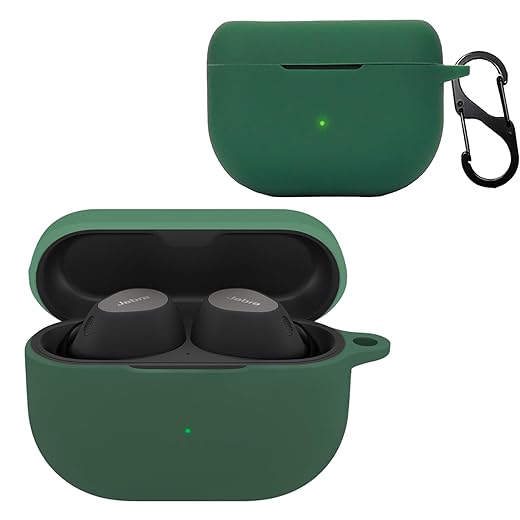
Protective cases, skins, and covers
A snug protective charging case (hard-shell or water-resistant zipper case) blocks snow and keeps contacts dry. Silicone skins and earbud covers add an outer barrier and improve grip when gloves are wet. Examples:
Thin weatherproof pouches for commuting
For pockets and backpacks, use an ultra-thin dry pouch or zippered weatherproof bag (brands like Sea to Summit or small roll-top micro dry bags). They keep pockets dry without bulk and slide easily under a jacket.
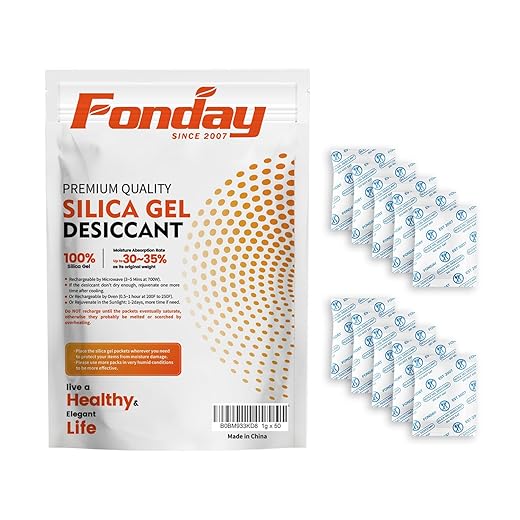
Desiccants and condensation control
Silica gel packets or small reusable pockets (Eva-Dry mini desiccants) absorb leftover moisture. Place one:
Use color-indicator packs so you know when to recharge/replace them. A tiny digital hygrometer for your bag or a change-color packet costs under $10 and helps you catch problems before corrosion starts. In real life, one commuter saved a pair of buds from muffled sound simply by keeping an Eva-Dry pouch in his backpack all winter.
Quick fixes when moisture gets inside: safe drying and recovery steps
If moisture sneaks into your earbuds or case, fast, careful action raises the odds they’ll fully recover. Follow these immediate actions first, then use safe drying methods that actually work.
Immediate steps (do these now)
Safe drying techniques that beat rice
Why not rice, hair dryers, or ovens?
How long to let them dry
Testing after drying
Routine maintenance to keep moisture damage away long-term
Clean regularly — the gentle how-to
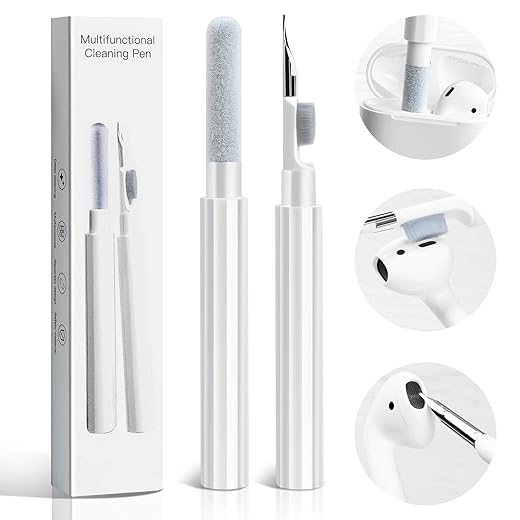
Make a habit of light cleaning once a week. Remove silicone or foam tips and use a soft-bristled brush (a toothbrush or a MagicFiber audio brush) to sweep away earwax and lint from mesh filters. For external surfaces, lightly dampen a cotton swab with 70% isopropyl alcohol and wipe; never drip alcohol into drivers. If you like gear, an electronics cleaning kit (microfiber cloth + anti‑static brush) is a good one-time buy.
Keep seals and filters working
Check the mesh and seals monthly—look for clogged meshes, torn foam, or split silicone. Models with visible filters (AirPods Pro, Samsung Galaxy Buds, Sony WF‑1000XM4) can often be cleared with a dry brush; replace anything torn or heavily soiled. If sound gets muffled, a quick clean often restores clarity—I once fixed a commuter’s “dead” left bud with two minutes of brushing.

When to swap tips and parts
Replace foam tips every 3–6 months if you use earbuds daily; silicone tips can last longer but swap them at the first sign of cracking, discoloration, or loss of seal. Consider branded Comply foam for better noise isolation, or the included OEM tips for a perfect fit.
Charging contacts and storage cycles
Keep charging pins clean with a dry microfiber cloth or a swab very lightly moistened with isopropyl alcohol; dry immediately. Refresh silica-gel packs every 2–3 months (or recharge reusable units per instructions) and swap them into your case before each winter. Store earbuds in a dry, room-temperature spot—avoid humid bathrooms.
Seasonal and safe-charging checks
Before winter, run a quick checklist: clean tips, inspect seals, refresh desiccants, and verify ports are bone-dry. Never charge if ports or contacts feel damp—allow 24–72 hours of drying depending on exposure, then test briefly while monitoring for heat or odd smells.
When to repair, replace, or make a warranty claim
Know when damage is likely irreversible
Some failures you can’t reliably fix at home. Look for these red flags:
If you spot corrosion, exposed circuitry, or a dead battery, repairs are often needed rather than more drying attempts.
Check warranty terms and document everything
Manufacturer warranties and IP ratings vary — many exclude accidental liquid damage even if a product has some splash resistance. Before anything else:

Weigh professional repair vs. replacement
Professional shops can perform board-level repairs, ultrasonic drying, or battery swaps, but costs can add up. Typical considerations:
Quick steps to file a claim or get service
With estimates and warranty details in hand, you can decide whether professional repair, a warranty claim, or replacement makes the most sense — then move on to the small daily habits that keep moisture away.
Small steps that make a big difference for your listening
Spot early signs, adopt simple daily habits, use protective accessories, follow safe drying steps if wet, and know when to seek help — that checklist covers the essentials. Make it routine to check for condensation, wipe and dry after exposure, store earbuds in a dry case with a moisture absorber, and avoid sudden temperature changes.
By taking these small, consistent actions you’ll cut the risk of moisture damage and keep your audio reliable all winter. Review this checklist before heading out and your earbuds will thank you. Stay warm and listen.