Why I Care About Sharpening in Northern Climates
I wrote this because blades matter more up north. Short growing seasons, frequent freeze–thaw cycles, and long, wet springs change how turf responds to cuts. Sharp blades help grass heal faster, resist disease, and look better.
My aim is practical: to give clear, climate-aware timing rules, simple inspection methods, and safe sharpening options. I focus on small changes that reduce scalping, save fuel, and extend equipment life.
I want you to finish this article with a straightforward schedule you can follow, a few quick tests to check blade condition, and confidence to sharpen safely—either at home or by a pro. Keep your turf healthy and your maintenance costs down.
I write from experience working on cool-season grasses like Kentucky bluegrass, fescue, and rye. My examples, tools, and schedule reflect northern realities so you can act with confidence and clarity this season today.


How Blade Sharpness Affects Turf, Equipment, and Fuel in the North
Shear vs. Tear: what a sharp blade does
When a blade is sharp it makes a clean shear—think of scissors slicing paper. That clean cut leaves a smooth grass edge that closes quickly and photosynthesizes efficiently. I’ve stood over a strip of Kentucky bluegrass and watched the difference: the sharp-cut turf has crisp, upright blades; the dull-cut strip looks shredded and browning at the tips. That ragged tear from a dull blade is what invites stress and disease.
Disease, crowns, and the short growing window
Ragged cuts are little open doors for pathogens. In northern climates, where spring recovery and fall hardening are squeezed into a narrow window, each unnecessary wound matters. A torn leaf takes longer to seal, diverts energy from crown development, and can delay tiller production. On cool-season lawns (fescues, bluegrass, rye), that slower recovery shows up as thinner turf in mid-summer heat or a late-starting lawn in spring—things I can’t afford in a short season.
Equipment impacts: fuel, vibration, and wear
Dull blades fight the grass. The engine has to work harder to maintain blade speed, so fuel consumption creeps up and my run times drop. In practice I routinely notice a higher throttle setting and slower groundspeed when blades are dull—translating to more fuel per lawn and extra hours on the engine.
Vibration is another immediate sign. Uneven or nicked blades introduce imbalance that I can feel in the handles; over weeks that vibration accelerates bearing wear, loosens fasteners, and shortens mower life. The cumulative effect is a noisier, hotter-running deck with more maintenance headaches than necessary.
Quick signs I watch for (practical, immediate checks)
Northern-specific amplifiers
Three regional factors make all this worse in the North:
Practical takeaway: in my northern yards I’m more proactive—I check for the visual signs before the first heavy spring cut and again after the next month of mowing. When I see vibration, higher fuel use, or ragged cuts, I take the blade off and address it immediately rather than letting small problems multiply.
How I Assess Blade Condition: Signs, Simple Tests, and Logkeeping
I inspect and evaluate blades every few cuts in spring and then weekly through the season. My approach is visual first, then a few quick hands-on tests, and finally logging the results so patterns—like sandy soil accelerating dulling—become obvious.
Visual signs I look for
These are the “don’t-ignore” signs. A small nick can become imbalance and vibration if left unchecked; I once left a 1/8″ chip and felt deck vibration within two weeks.
Performance and turf indicators
If the lawn shows these symptoms after a normal mowing, I take a blade off and test it.
Simple tests I use
A quick example: on a sandy lot last year, my log showed I was dulling blades every ~22 hours; on a shaded, loamy yard I got 38+ hours between sharpenings.
Logkeeping: what I record
I keep a simple spreadsheet or notebook with these columns:
Thresholds I use to translate observations into action:
With these inspections, tests, and a short log I rarely get surprised by vibration or a ragged lawn. Next I’ll lay out the practical sharpening schedule I follow through a northern season.
A Practical Northern-Climate Sharpening Schedule I Follow
Spring: clean start (first major cut)
I treat spring as my most important sharpening moment. I remove and inspect blades just before the first major mowing after snowmelt — typically about 1–2 weeks after the last expected frost or as soon as grass shows steady active growth. My steps are simple:
Example: in my Zone 4 yard the last frost is usually May 10; I plan a sharpening around May 20 so the first few cuts slice cleanly and don’t stress recovering turf.
Mid-season: tie it to hours and growth spurts
Mid-season touch-ups depend more on usage than calendar. My rule: sharpen roughly halfway through the mowing season or after 20–30 cutting hours, whichever comes first. If I hit rocky or sandy patches, I move that to “as soon as possible.”
Practical cues I use:
For tools, I use a handheld angle grinder (Makita 9557-style) for quick bevels, and a WEN 4280-style bench grinder when I need to remove more metal. For a very fast, repeatable job I’ll use a dedicated sharpener if available; they save time and keep the angle consistent.
Late season: prep for storage
Before winter storage I do a final service:
I do this about 2–4 weeks before my average first hard frost so the machine sits protected, and so I’m not re-dulling blades on late-season cleanups.
Exceptions and special cases
I keep these events logged against local frost dates and cumulative hours so the schedule adapts to wetter springs or faster-growing summers without guesswork.
How I Sharpen and Maintain Blades: Tools, Technique, Safety, and When to Use a Pro
My tool choices and when I pick each
I keep a small, staged toolkit so I match the method to the job:
For precision honing and burr control I use structured guides and stones rather than freehand grinders—small stones give a clean edge that actually lasts longer and reduces tearing on northern cool-season grasses.
Step‑by‑step technique I follow
- Safety first: disconnect the spark plug (or remove the battery on electrics), chock wheels, and use a jack with solid blocks so the mower cannot move. I always wear eye protection, cut-resistant gloves, and hearing protection during grinding.
- Mark orientation: before removing, mark each blade with spray paint or a sharpie so the rotation and position are obvious when reinstalling.
- Remove and clamp: take the blade off, clamp it in a vise with soft jaws or wood pads to avoid twisting the cutting edge.
- Maintain the cutting angle: follow the existing bevel—most residential blades sit around 25–35°. With a file, stroke in one direction with the original angle. With a grinder, take light passes and check frequently to avoid overheating or removing too much material.
- Deburr and balance: after sharpening, deburr the top and bottom with a file or stone, then check balance on a blade balancer or a nailed-up screwdriver pivot. Grind the heavy side slightly until it balances.
Safety and mower‑handling reminders
When I DIY vs. call a pro
I do touch-ups, minor regrinds, and balance checks myself—these are quick and cost-effective. I send blades to a pro when:
Pros have commercial grinders and can restore correct geometry without overheating steel.
Aftercare and storage
Next, I bring these practices together into a single guiding rule that keeps my northern lawn healthy year-round.
Putting It All Together: My Simple Rule for Northern Lawns
I inspect and sharpen at the start of the season, schedule at least one mid‑season touch‑up (or every 20–30 running hours), sharpen before winter storage, and sharpen immediately after any strike or noticeable performance decline. That routine keeps cut quality high, reduces turf tearing and disease risk, improves fuel efficiency, and lowers wear on the deck and engine. I follow simple blade tests and a brief log so adjustments reflect wet springs, sandy soils, or heavy use.
Keeping a short, consistent log and using the simple inspection checks I described lets me adapt timing to local conditions while preserving turf health and extending mower life. Do the basics reliably, and you’ll save time, money, and headaches all season. If you want, start a single notebook or phone note today and track hours, hits, and blade condition through the year regularly.

Nice mix of practical tips and tools. I liked the part about how dull blades affect turf and fuel — made me less lazy about maintenance.
I use a Universal Rotary plus the Multipurpose 4-Pack when I’m between full hones. Also keeps the deck from clogging mid-season.
One tip: label your sharpeners with the date you last used them so you don’t accidentally expect them to last forever.
Tom — how do you store the sharpeners? I toss them in a toolbox and they get scratched up.
Love the labeling idea, Tom. Small habit like that prevents accidental overuse and helps track when tools actually need replacing.
Priya — I hang small pouches on a pegboard, keeps them dry and visible. Works for cheap sharpeners too.
Super helpful article — concise and actionable.
I can vouch for the Saker kit; it made the learning curve much easier. Also grabbed the Universal Rotary Lawn Mower Blade Sharpener for quick jobs and it saves me a trip to the shop.
PS: if anyone’s on a budget, the 2-Pack Blue sharpeners + a file can get you surprisingly far.
Loved this — practical and exactly the kind of no-nonsense routine I needed.
I live in zone 4 and the bit about sharpening frequency for late fall really resonated.
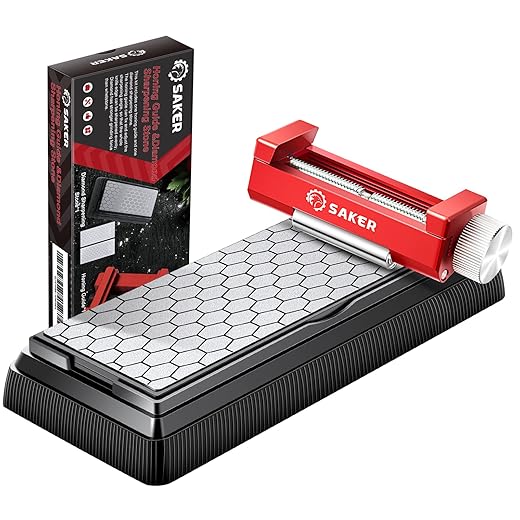
I bought the Saker Off-Center Honing Guide and whetstones kit after reading this and it actually made edge consistency way easier.
Also, the Multipurpose Lawn Mower Blade Sharpener, 4-Pack is cheap and handy for quick touch-ups between full hones.
One tiny nit: would love a quick checklist printable for the logkeeping section. 🙂
Liam — I do a full whetstone hone every 2-3 months during the season, and the multipurpose sharpener maybe once every 3-4 mowings if I notice dulling. YMMV with soil grit.
I made a simple paper log like the article suggested — saved me so much time. If you want I can upload a photo of my layout (format: date, blades swapped/sharpened, notes).
Anna — can you share how long you wait between a whetstone hone and a quick touch-up on the multipurpose sharpener? I’m paranoid about over-sharpening.
Thanks, Anna — glad the Saker kit helped. I’ll work up a one-page printable checklist and add it to the article next update. Good tip about quick touch-ups with the 4-pack sharpeners.
Haha, sharpen blades to save fuel — next you’ll tell me sharpening my toothbrush will make it brush better 😂
But seriously: tried the 2-Pack Blue Lawn Mower Blade Sharpeners after the post and they are decent for a quick evening fix. Not a pro result, but better than a dull chunk of metal.
Jordan’s sequence is exactly what I recommend for best edge geometry: file to true the edge, whetstone for bevel, then a quick rotary/multipurpose touch-up before mowing.
Marcus — funny but true. I use the blue ones before the neighbor kids mow my lawn (kidding) — they work for a few passes.
I’ve got spare 2-pack sharpeners in the shed — they saved me last season when I couldn’t get to the bench. Not perfect but emergency-approved.
Evelyn — lol, neighbor kids are my favorite lawn risk metric.
If you want a cleaner edge go whetstone > file > quick sharpener. The blue ones skip a step but save time.
Totally get the toothbrush joke — sharpening isn’t magic but it reduces tear on grass and engine load. The blue 2-pack is perfect for quick maintenance between deeper hones.
Good read. I never thought about fuel savings from sharper blades — makes sense though.
Quick question: the 100-Pack Plastic Grass Trimmer Replacement Blades were mentioned — anyone have experience using those in colder months vs spring? Do they get brittle?
Short answer: plastics can get stiffer in cold temps. If you store a pack in an unheated shed they might be a bit more brittle. If you plan to use them in cold conditions, keep them in a garage or warm spot before use.
I keep mine inside during winter and haven’t had breakage issues. But if you toss them in a cold trunk for a month, yeah, expect a few cracks.
Appreciate the logkeeping advice — I’m a detail person and the ‘simple rule for northern lawns’ actually helped me simplify.
One piece of constructive feedback: the section on the Universal Rotary Lawn Mower Blade Sharpener, 4-Pack could use a short warning about balancing after sharpening. My mower started vibrating a bit until I balanced the blade.
Great point, Evelyn — I’ll add a balancing subsection with a quick how-to and recommended tolerances (e.g., <1/8 in wobble). Thanks for flagging that.